Learn how to create and display a scene with a basemap layer and an elevation layer. Set properties of the scene's camera to control the 3D perspective.
Like a map, a scene contains layers of geographic data. It contains a basemap layer and, optionally, one or more data layers. To provide a realistic view of the terrain, you can also add elevation layers to define the height of the surface across the scene. The 3D perspective of the scene is controlled by the scene's camera, which defines the position of the scene observer in 3D space.
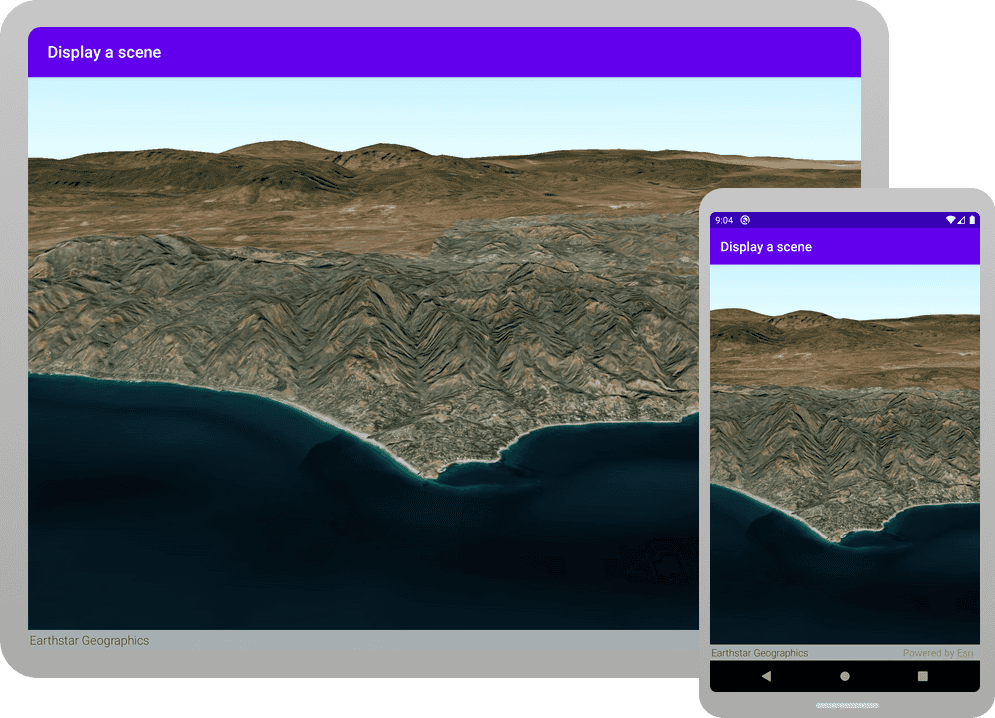
In this tutorial, you create and display a scene using the imagery basemap layer. The surface of the scene is defined with an elevation layer and the camera is positioned to display an area of the Santa Monica Mountains in the scene view.
The scene and code will be used as the starting point for other 3D tutorials.
Prerequisites
Before starting this tutorial:
-
You need an ArcGIS Location Platform or ArcGIS Online account.
-
Confirm that your system meets the system requirements.
-
An IDE for Android development in Kotlin.
Steps
Create a new Android Studio project
Use Android Studio to create an app and configure it to reference the API.
-
Open Android Studio.
- In the menu bar, click File > New > New Project....
- In the Create New Project window, make sure Phone and Tablet tab is selected, and then select Empty Activity. Click Next.
Gradle is the default build tool in Android Studio. If you are unable to use Gradle, see Getting the API Manually.
- In the Configure your project window, set the following configuration options:
- Name:
Display a scene. - Package name: Change to
com.example.app. Or change to match your organization. - Save location: Set to a new folder.
- Language: Kotlin
- Minimum SDK: API 23: Android 6.0 (Marshmallow)
- Name:
-
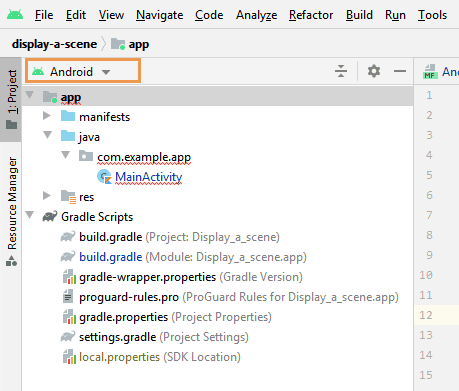
In the Project tool window, make sure that your current view is Android. These tutorial instructions refer to that view.
If your view name is something other than Android (such as Project or Packages), click on the leftmost control in the title bar of the Project tool window, and select Android from the list.
-
From the Project tool window, open Gradle Scripts > build.gradle (Project: Display_a_scene). Replace the contents of the file with the following code:
build.gradle (Project: Display_a_scene)Use dark colors for code blocks Change line Change line Change line Change line Change line Change line Change line Change line Change line Change line Change line // Top-level build file where you can add configuration options common to all sub-projects/modules. plugins { id 'com.android.application' version '7.2.1' apply false id 'com.android.library' version '7.2.1' apply false id 'org.jetbrains.kotlin.android' version '1.7.0' apply false } task clean(type: Delete) { delete rootProject.buildDir } -
From the Project tool window, open Gradle Scripts > build.gradle (Module: Display_a_scene.app). Replace the contents of the file with the following code:
build.gradle (Module: Display_a_scene.app)Use dark colors for code blocks Change line Change line Change line Change line Change line Change line Change line Change line Change line Change line Change line Change line Change line Change line Change line Change line Change line Change line Change line Change line Change line Change line Change line Change line Change line Change line Change line Change line Change line Change line Change line Change line Change line Change line Change line Change line Change line Change line Change line Change line Change line Change line Change line Change line Change line Change line Change line Change line Change line Change line Change line plugins { id 'com.android.application' id 'org.jetbrains.kotlin.android' } android { compileSdkVersion 32 defaultConfig { applicationId "com.example.app" minSdkVersion 23 targetSdkVersion 32 versionCode 1 versionName "1.0" } buildTypes { release { minifyEnabled false proguardFiles getDefaultProguardFile('proguard-android-optimize.txt'), 'proguard-rules.pro' } } compileOptions { sourceCompatibility JavaVersion.VERSION_1_8 targetCompatibility JavaVersion.VERSION_1_8 } kotlinOptions { jvmTarget = JavaVersion.VERSION_1_8.toString() } buildFeatures { viewBinding true } packagingOptions { exclude 'META-INF/DEPENDENCIES' } } dependencies { implementation fileTree(dir: "libs", include: ["*.jar"]) implementation 'androidx.appcompat:appcompat:1.4.2' implementation 'androidx.constraintlayout:constraintlayout:2.1.4' implementation 'androidx.multidex:multidex:2.0.1' implementation 'com.google.android.material:material:1.6.1' implementation 'com.esri.arcgisruntime:arcgis-android:100.15.0' } -
From the Project tool window, open Gradle Scripts > settings.gradle. Replace the contents of the file with the following code:
settings.gradle (Display a map)Use dark colors for code blocks Change line Change line Change line Change line Change line Change line Change line Change line Change line Change line Change line Change line Change line Change line Change line Change line Change line Change line Change line Change line Change line Change line Change line Change line import org.gradle.api.initialization.resolve.RepositoriesMode pluginManagement { repositories { gradlePluginPortal() google() mavenCentral() } } dependencyResolutionManagement { repositoriesMode.set(RepositoriesMode.FAIL_ON_PROJECT_REPOS) repositories { google() mavenCentral() maven { url 'https://esri.jfrog.io/artifactory/arcgis' } } } rootProject.name = "Display a scene" include ':app' -
Sync the Gradle changes. Click the Sync now prompt or click the refresh icon (Sync Project with Gradle Files) in the toolbar. This may take several minutes.
-
From the Project tool window, open app > manifests > AndroidManifest.xml. Update the Android manifest to allow network access, and also to indicate the app uses OpenGL 2.0 or above.
Insert these new elements within the
manifestelement. Do not alter or remove any other statements.Depending on what ArcGIS functionality you add in future tutorials, it is likely you will need to add additional permissions to your manifest.
AndroidManifest.xmlUse dark colors for code blocks 3 4 5 6Add line. Add line. Add line. Add line. <manifest xmlns:android="http://schemas.android.com/apk/res/android" xmlns:tools="http://schemas.android.com/tools" package="com.example.app"> <uses-permission android:name="android.permission.INTERNET" /> <uses-feature android:glEsVersion="0x00020000" android:required="true" />
Add import statements
Open app > java > com.example.app MainActivity.kt, and add import statements to reference the ArcGIS Runtime API.
package com.example.app
import androidx.appcompat.app.AppCompatActivity
import android.os.Bundle
import com.esri.arcgisruntime.ArcGISRuntimeEnvironment
import com.esri.arcgisruntime.geometry.Point
import com.esri.arcgisruntime.geometry.SpatialReferences
import com.esri.arcgisruntime.mapping.ArcGISScene
import com.esri.arcgisruntime.mapping.ArcGISTiledElevationSource
import com.esri.arcgisruntime.mapping.BasemapStyle
import com.esri.arcgisruntime.mapping.Surface
import com.esri.arcgisruntime.mapping.view.Camera
import com.esri.arcgisruntime.mapping.view.SceneView
import com.example.app.databinding.ActivityMainBinding
Add a UI for the scene view
A scene view is a UI component that displays a scene. It also handles user interactions with the scene, including navigating with touch gestures. Use XML to add a scene view to the UI and make it available to the main activity source code.
-
In app > res > layout > activity_main.xml, replace the entire
Textelement with aView Sceneelement.View If you do not see the XML code, select the Code tab to switch out of design mode and display the XML code in the editor.
Your
Sceneelement creates an instance of theView Sceneclass from the ArcGIS Runtime API for Android.View In your main activity source code, you can access the
Sceneusing an implicit property, which is declared in the value of theView androidattribute. In this case, the property will be named:id scene.View activity_main.xmlUse dark colors for code blocks 1 2 3 4 5 6 7 8 17 18Change line Change line Change line Change line Change line Change line Change line Change line <?xml version="1.0" encoding="utf-8"?> <androidx.constraintlayout.widget.ConstraintLayout xmlns:android="http://schemas.android.com/apk/res/android" xmlns:app="http://schemas.android.com/apk/res-auto" xmlns:tools="http://schemas.android.com/tools" android:layout_width="match_parent" android:layout_height="match_parent" tools:context=".MainActivity"> <com.esri.arcgisruntime.mapping.view.SceneView android:id="@+id/sceneView" android:layout_width="0dp" android:layout_height="0dp" app:layout_constraintBottom_toBottomOf="parent" app:layout_constraintEnd_toEndOf="parent" app:layout_constraintStart_toStartOf="parent" app:layout_constraintTop_toTopOf="parent" /> </androidx.constraintlayout.widget.ConstraintLayout> -
In MainActivity.kt, create a read-only local variable named
activityreferencing the generated Android classMain Binding Activity.Main Binding MainActivity.ktUse dark colors for code blocks 35 36 40Add line. Add line. Add line. class MainActivity : AppCompatActivity() { private val activityMainBinding: ActivityMainBinding by lazy { ActivityMainBinding.inflate(layoutInflater) } -
Create a read-only variable named
sceneand bind it to theView scenecreated in activity_main.xml.View MainActivity.ktUse dark colors for code blocks 35 36 37 38 39 40Add line. Add line. Add line. class MainActivity : AppCompatActivity() { private val activityMainBinding: ActivityMainBinding by lazy { ActivityMainBinding.inflate(layoutInflater) } private val sceneView: SceneView by lazy { activityMainBinding.sceneView }
Add a scene
Use the scene view to display a scene centered on the Santa Monica Mountains in California. The scene will contain a imagery basemap layer.
-
In MainActivity.kt, add a new
setupmethod in yourScene() Mainclass and create anActivity ArcGISwith an imagery basemap.Scene MainActivity.ktUse dark colors for code blocks 52 53 54 56 55Add line. // set up your scene here. You will call this method from onCreate() private fun setupScene() { val scene = ArcGISScene(BasemapStyle.ARCGIS_IMAGERY_STANDARD) } -
Set the
sceneproperty ofsceneto the newView ArcGIS.Scene MainActivity.ktUse dark colors for code blocks 52 53 54 55 56 59 58Add line. Add line. // set up your scene here. You will call this method from onCreate() private fun setupScene() { val scene = ArcGISScene(BasemapStyle.ARCGIS_IMAGERY_STANDARD) // set the scene on the scene view sceneView.scene = scene } -
Create a new
ArcGISand use it to create a newTiled Elevation Source Surface. Then set theelevationproperty on theExaggeration surfaceto 2.5f to increase the 3D effect of the elevation.MainActivity.ktUse dark colors for code blocks 52 53 54 55 56 57 58 59 64Add line. Add line. Add line. Add line. Add line. Add line. // set up your scene here. You will call this method from onCreate() private fun setupScene() { val scene = ArcGISScene(BasemapStyle.ARCGIS_IMAGERY_STANDARD) // set the scene on the scene view sceneView.scene = scene // add base surface for elevation data val elevationSource = ArcGISTiledElevationSource("https://elevation3d.arcgis.com/arcgis/rest/services/WorldElevation3D/Terrain3D/ImageServer") val surface = Surface(listOf(elevationSource)) // add an exaggeration factor to increase the 3D effect of the elevation. surface.elevationExaggeration = 2.5f } -
Set the
baseproperty of theSurface sceneto thesurface.MainActivity.ktUse dark colors for code blocks 52 53 54 55 56 57 58 59 60 61 62 63 64 65 67 68Add line. // set up your scene here. You will call this method from onCreate() private fun setupScene() { val scene = ArcGISScene(BasemapStyle.ARCGIS_IMAGERY_STANDARD) // set the scene on the scene view sceneView.scene = scene // add base surface for elevation data val elevationSource = ArcGISTiledElevationSource("https://elevation3d.arcgis.com/arcgis/rest/services/WorldElevation3D/Terrain3D/ImageServer") val surface = Surface(listOf(elevationSource)) // add an exaggeration factor to increase the 3D effect of the elevation. surface.elevationExaggeration = 2.5f scene.baseSurface = surface } -
Create a
Pointfor the camera and assign it tocamera. Then create aLocation Camera, passing thecameraand values for the camera's heading, pitch, and roll.Location The position from which you view the scene is defined by a
Camera. The following properties of the camera are used to define an observation point in the scene:- 3D location: Latitude, longitude, and altitude
- Heading: Azimuth of the camera's direction
- Pitch: Up and down angle
- Roll: Side-to-side angle
MainActivity.ktUse dark colors for code blocks 52 53 54 55 56 57 58 59 60 61 62 63 64 65 66 67 73Add line. Add line. Add line. Add line. Add line. // set up your scene here. You will call this method from onCreate() private fun setupScene() { val scene = ArcGISScene(BasemapStyle.ARCGIS_IMAGERY_STANDARD) // set the scene on the scene view sceneView.scene = scene // add base surface for elevation data val elevationSource = ArcGISTiledElevationSource("https://elevation3d.arcgis.com/arcgis/rest/services/WorldElevation3D/Terrain3D/ImageServer") val surface = Surface(listOf(elevationSource)) // add an exaggeration factor to increase the 3D effect of the elevation. surface.elevationExaggeration = 2.5f scene.baseSurface = surface // Point(x, y, z, spatialReference) val cameraLocation = Point(-118.794, 33.909, 5330.0, SpatialReferences.getWgs84()) // Camera(location, heading, pitch, roll) val camera = Camera(cameraLocation, 355.0, 72.0, 0.0) } -
Call
seton theViewpoint Camera() sceneand pass in theView camera.MainActivity.ktUse dark colors for code blocks 52 53 54 55 56 57 58 59 60 61 62 63 64 65 66 67 68 69 70 71 72 74 75Add line. // set up your scene here. You will call this method from onCreate() private fun setupScene() { val scene = ArcGISScene(BasemapStyle.ARCGIS_IMAGERY_STANDARD) // set the scene on the scene view sceneView.scene = scene // add base surface for elevation data val elevationSource = ArcGISTiledElevationSource("https://elevation3d.arcgis.com/arcgis/rest/services/WorldElevation3D/Terrain3D/ImageServer") val surface = Surface(listOf(elevationSource)) // add an exaggeration factor to increase the 3D effect of the elevation. surface.elevationExaggeration = 2.5f scene.baseSurface = surface // Point(x, y, z, spatialReference) val cameraLocation = Point(-118.794, 33.909, 5330.0, SpatialReferences.getWgs84()) // Camera(location, heading, pitch, roll) val camera = Camera(cameraLocation, 355.0, 72.0, 0.0) sceneView.setViewpointCamera(camera) } -
In the
onmethod, modify theCreate() setcall to takeContent View() activityas its parameter. Next, callMain Binding.root setup.Scene() Android Studio's Create New Project wizard, which you used to create this project, usually passes the parameter
R.layout.activityto the_main setcall.Content View() MainActivity.ktUse dark colors for code blocks 45 46 47 49 51 52Change line Add line. override fun onCreate(savedInstanceState: Bundle?) { super.onCreate(savedInstanceState) setContentView(activityMainBinding.root) setupScene() } -
Override the Android life cycle methods
on,Pause() on, andResume() onto pause, resume and dispose of theDestroy() scene.View The
sceneneeds to know when your app goes to the background or is restored from background in order to properly manage the view. When the view is no longer needed, its resources should be released by callingView dispose()onscene.View You can place these methods anywhere inside your
Mainclass definition.Activity MainActivity.ktUse dark colors for code blocks Add line. Add line. Add line. Add line. Add line. Add line. Add line. Add line. Add line. Add line. Add line. Add line. Add line. Add line. override fun onPause() { sceneView.pause() super.onPause() } override fun onResume() { super.onResume() sceneView.resume() } override fun onDestroy() { sceneView.dispose() super.onDestroy() }
Get an access token
You need an access token to use the location services used in this tutorial.
-
Go to the Create an API key tutorial to obtain an access token using your ArcGIS Location Platform or ArcGIS Online account.
-
Ensure that the following privilege is enabled: Location services > Basemaps > Basemap styles service.
-
Copy the access token as it will be used in the next step.
To learn more about other ways to get an access token, go to Types of authentication.
Set your API key
-
Create the
setmethod, in which you set theApi Key For App() apiproperty on theKey ArcGISusing the access token. Paste your access token inside the quotes, replacing YOUR_ACCESS_TOKEN.Runtime Environment MainActivity.ktUse dark colors for code blocks 64 65 66 67 68 74 75 76 77 78Add line. Add line. Add line. Add line. Add line. override fun onDestroy() { sceneView.dispose() super.onDestroy() } private fun setApiKeyForApp(){ ArcGISRuntimeEnvironment.setApiKey("YOUR_ACCESS_TOKEN") } // set up your scene here. You will call this method from onCreate() private fun setupScene() { val scene = ArcGISScene(BasemapStyle.ARCGIS_IMAGERY_STANDARD) -
In
on, callCreate() set.API Key For App() MainActivity.ktUse dark colors for code blocks 45 46 47 48 49 51 52 53 54Add line. override fun onCreate(savedInstanceState: Bundle?) { super.onCreate(savedInstanceState) setContentView(activityMainBinding.root) setApiKeyForApp() setupScene() } -
Click Run > Run > app to run the app.
The Android Emulator should display and run your app in the Android Virtual Devcie (AVD) selected in the Android Studio toolbar:
If your app builds but no AVD displays, you need to add one. Click Tools > AVD Manager > Create Virtual Device...
You should see a scene with the imagery basemap layer centered on the Santa Monica Mountains in California. Pinch, drag, and double-tap the scene view to explore the scene.
What's next?
Learn how to use additional API features, ArcGIS location services, and ArcGIS tools in these tutorials: