As a user of ArcGIS, you may need to remove items from your content library. Whether it's maps, layers, or web applications, the ability to delete items is part of maintaining an ArcGIS portal environment. In this section, you will explore the process of deleting items, highlighting the steps and considerations.
Why delete items
You delete items to:
- Remove items that are no longer needed and not being used by anyone in the organization.
- Maintain an organized environment by removing outdated or redundant content.
- Allow users who are using an item the time to find a replacement by first marking the item as deprecated before deleting it.
How to copy items
The general steps of transferring item ownership:
1. Access your content
Sign in to your portal and ensure that you have administrative privileges to manage content within your organization.
- ArcGIS portal (ArcGIS Location Platform or ArcGIS Online)
- ArcGIS Enterprise portal (ArcGIS Enterprise)
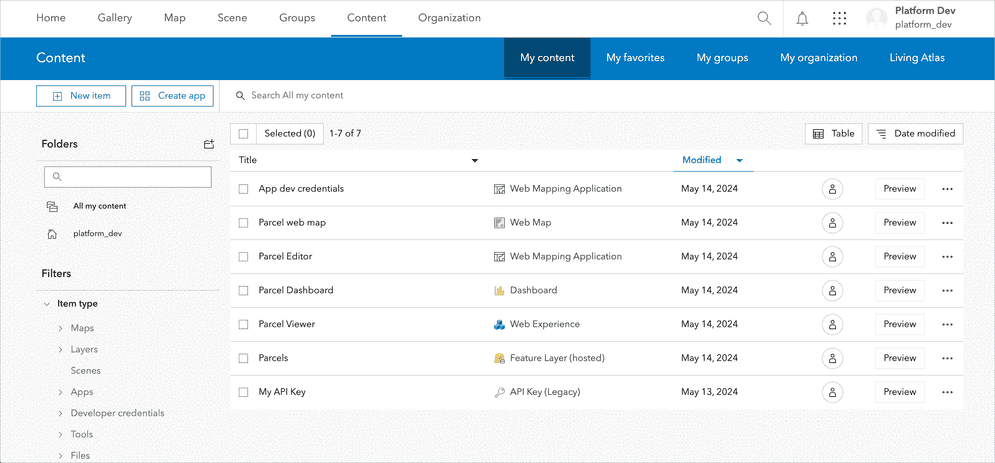
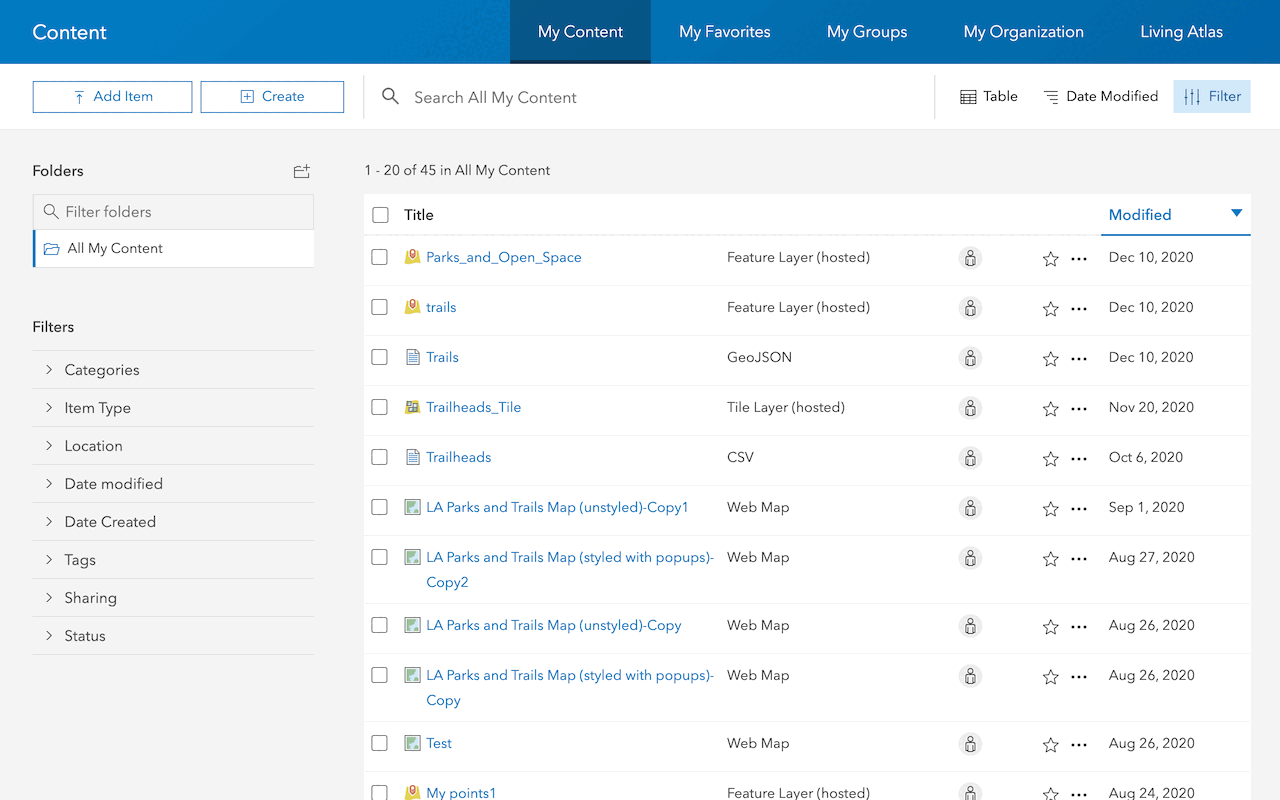
Go to the Content tab where you can view all the content available in your organization.
2. Select the item
To find and select an item, you can follow one of these methods:
- Use the search bar at the top of the page to enter keywords related to the item you're looking for.
- You can browse through your content by clicking on the Content tab on the top navigation bar.
- You can filter your content by type, owner, or other criteria to locate the specific item more efficiently.
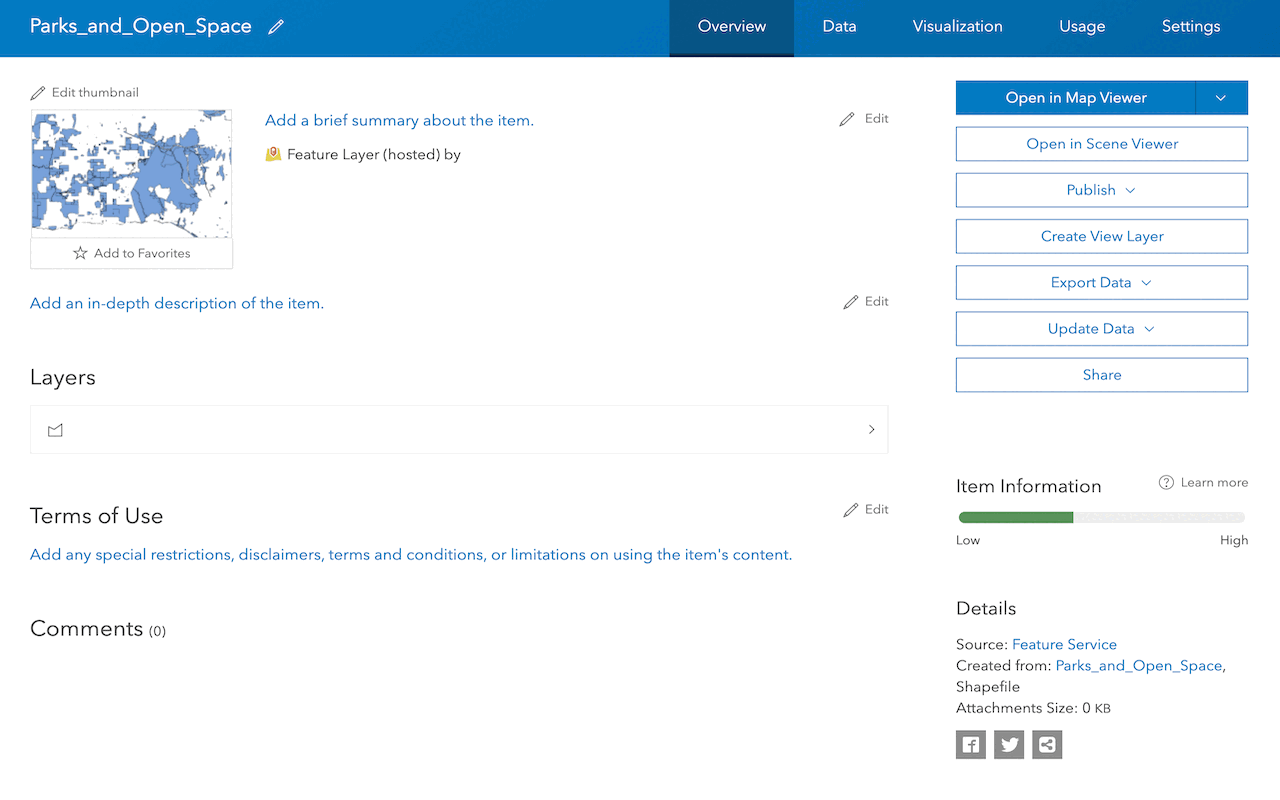
Once you find the item, click on it to open its details page, where you can view its properties and perform various actions.
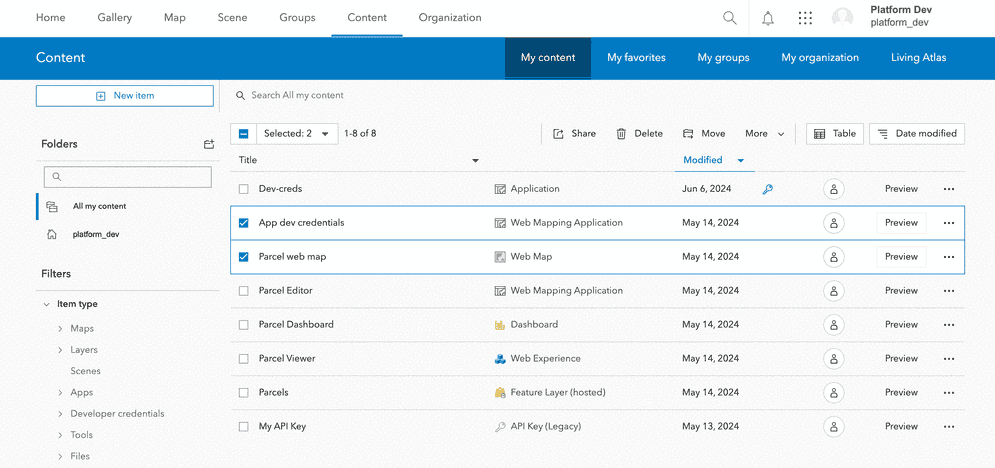
3. Delete the item

To delete a the selected item, you can go to the item's details page, disable delete protection, and click the Delete Item button. Additionally, to delete multiple items, you select the items in the Content page and click Delete. Deleting an item removes it completely from the organization and ArcGIS Online.
There are key differences between deleting a single item and deleting multiple items in ArcGIS portal:
-
Deleting a single item:
- You can delete a single item from its details page by disabling delete protection and clicking the Delete Item button.
- This method allows you to delete one item at a time.
-
Deleting multiple items:
- To delete multiple items more efficiently, you can go to the Content page, select the items, and click Delete.
- This batch delete method allows you to delete multiple items at once, which is more efficient than deleting them one by one.
4. Verify
After deleting an item, it is important to verify the deletion was successful and that the item is no longer accessible within your organization. To do this, you can follow these suggestions:
- Once item is deleted, confirm the item is not available by navigating to the location where the item was previously stored.
- Use the search functionality within portal to search for the deleted item by its title, keywords, or other identifying information.
- If the deleted item had dependencies, such as hosted feature layers or web maps that were used in applications, verify that these dependencies are still functional.
Code examples
Delete an item
Below is an example that demonstrates how to delete an item in ArcGIS Online:
item_id = 'your_item_id_here' # Replace 'your_item_id_here' with the actual item ID
# Get the item
item = gis.content.get(item_id)
# Delete the item
delete_result = item.delete()
Delete multiple items
Below is an example that demonstrates how to delete multiple items in ArcGIS Online:
item_ids = ['item1_id', 'item2_id', 'item3_id'] # Replace with the actual item IDs
# Loop through each item ID and delete it
for item_id in item_ids:
try:
item = gis.content.get(item_id)
item.delete()
print(f"Item '{item.title}' (ID: {item.id}) deleted successfully.")
Verify privileges to delete items
Below is an example that demonstrates how an organization administrator can verify if a user has the proper privileges to delete items:
# Check if the user has the necessary privileges to delete items
if user.role == "org_admin" or user.role == "user_type_publisher":
print(f"The user '{username_to_check}' has the necessary privileges to delete items.")
else:
print(f"The user '{username_to_check}' does not have the necessary privileges to delete items.")
Tutorials
Import data to create a feature layer
Use data management tools to import files and create a feature layer in a feature service.
Define a new feature layer
Use data management tools to define and create a new empty feature layer in a feature service.
Manage a feature layer
Use a hosted feature layer item to set the properties and settings of a feature layer in a feature service.
Create a vector tile service
Use data management tools to create a new vector tile service from a feature service.
Create a map tile service
Use ArcGIS Online or scripting APIs to publish a map tile service.
Services
Feature service
Add, update, delete, and query feature data.
Vector tile service
Store and access vector tile data.
Map tile service
Store and access map tile data.
Image service
Store and access imagery and raster data.
API support
Use data management tools or Client APIs to create, manage, and access data services. The table below outlines the level of support for each API.
- 1. Use portal class and direct REST API requests
- 2. Access via ArcGIS REST JS
- 3. Requires manually setting styles for renderers