
What are content and data tools?
Content and data tools are the functionality in a portal that you can use to create and manage content and data for your applications. These tool are located in the content manager page which provides a centralized location for you to browse, search, and manage various types of geospatial content in your organization. Here are the key features and functionalities:
You use the content manager page to:
- Browse and organize content using the tabs below:
- My Content: Items you own.
- My Favorites: Bookmarked items.
- My Groups: Items shared in groups you belong to.
- My Organization: All content in your portal.
- Living Atlas: Curated global content.
- Search for items using keywords. Apply additional filters like item type, date range, and categories to refine search results.
- Manage items you own. You can view, edit, move, and delete items in your portal.
- Share items with groups for team collaboration. Configure sharing settings to allow public access or restrict to specific users/groups.
Content tools
The content manager page allows you to manage and organize geospatial data and resources. You can upload, create, and store various types of content such as maps, layers, applications, and files. Additionally, the content manager page provides options for sharing content with others, setting permissions, and managing item details and metadata. This functionality supports data management and collaboration in portal.
The section below introduces tools you can use to create content and data in your portal.
New item tool
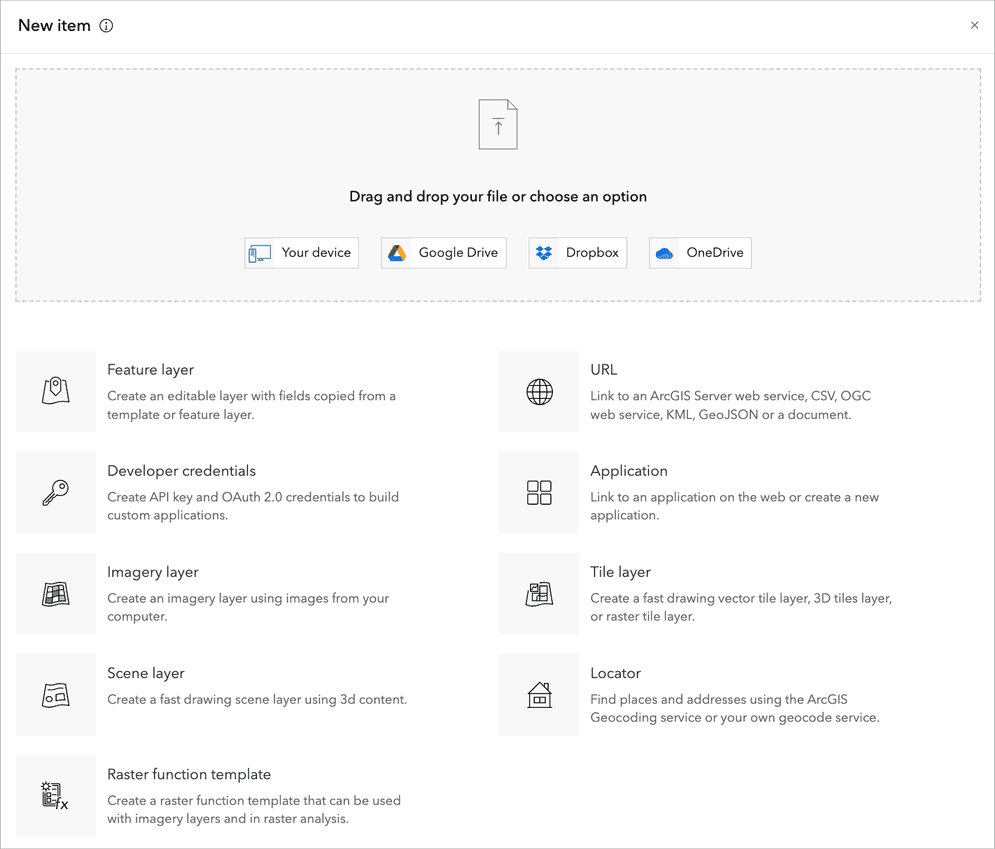
The New Item tool in portal allows you to create and add various types of content to your organization. You can upload files, such as shapefiles, CSVs, and images, or create new items like web maps, feature layers, and applications. The tool guides you through specifying item details, setting metadata, and configuring sharing permissions. This functionality streamlines the process of creating content in your portal.
Below is a list of all of the New item tools that you can use to create content.
| Symbol | Tool | Description |
|---|---|---|

| Add documents, images, and other files to your portal. Drag and drop a PDF file, image, document and more. | |

| Create editable layers from scratch or copied from a template or an existing feature layer. | |

| Create OAuth 2.0 credentials in ArcGIS to build custom applications. | |

| Create vector tile layer, 3D tiles layer, or raster tile layer . | |

| Use the ArcGIS World Geocoding Service or create your own geocode service to find places and addresses. | |

| Create new ArcGIS services that link to other services like CSV, OGC, KML or GeoJSON. | |

| Create a new registered application in your portal. |
Feature layer tool
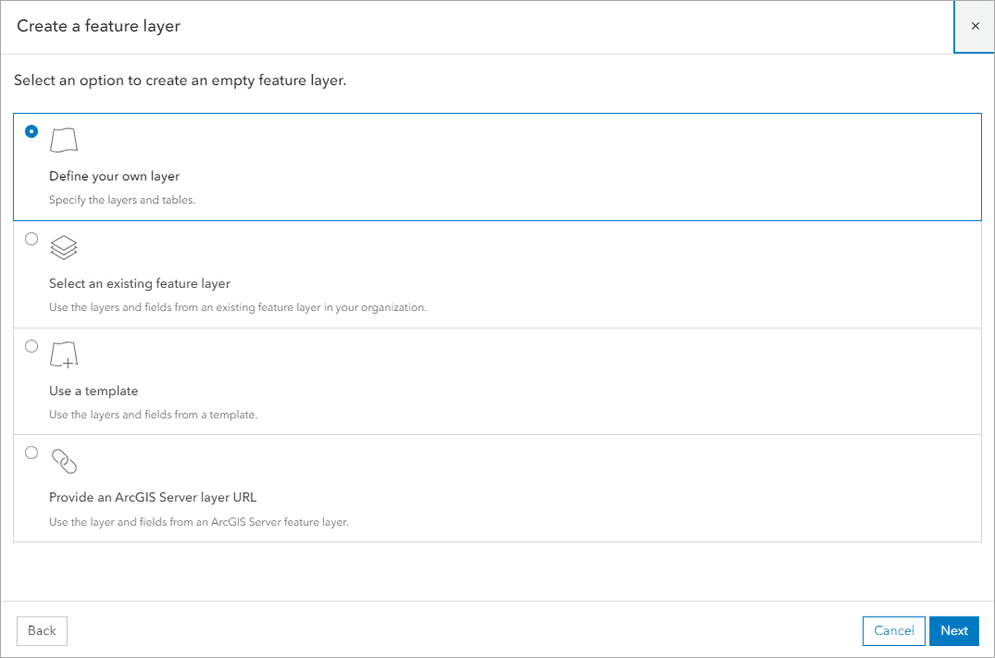
The feature layer tool in the New item dialog enables you to create and publish new feature layers from various data sources. This tool allows you to create a new feature layer from these options:
- Define and create a feature layer from scratch.
- From an existing feature layer.
- From a pre-defined template.
- From an existing ArcGIS Server feature layer.
You access the feature layer tool by creating a new item. The steps to use the tool are:
- Sign in to your portal.
- Click Content > My Content > New item.
- Click Feature layer.
- Select the option to create the new feature layer:
- Define your own layer
- Select an existing feature layer
- Use a template
- Provide an ArcGIS Server layer URL
- Enter additional item details.
- Click Save to create the new item in the portal.
Developer credentials tool

The developer credential tool is a tool in a portal that allows you to create and define the properties for a developer credential. You typically create a new set of developer credentials for each application you develop. Each credential will have a specific set of properties that support the type of authentication you are implementing and the type of functionality required by your application.
Imagery layer tool
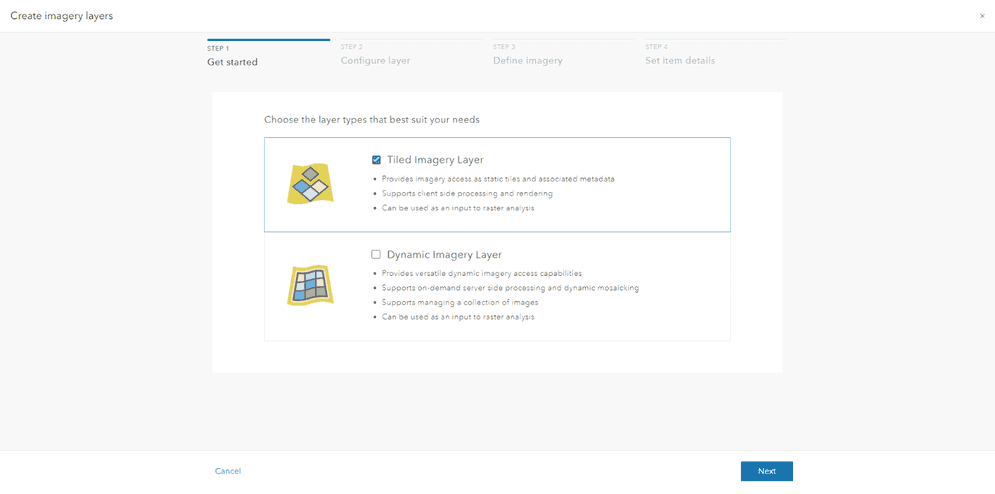
The imagery layer tool allows users to create and publish imagery layers from raster data sources. This tool supports various raster formats and enables users to define properties such as rendering rules, compression settings, and metadata. Imagery layers can be used for visualization, analysis, and integration into maps and applications within the ArcGIS Online environment.
You access the feature layer tool by creating a new item. The steps to use the tool are:
- Sign in to your portal.
- Click Content > My Content > New item.
- Click Imagery layer.
- Choose an imagery layer type.
- Tiled Imagery Layer
- Dynamic Imagery Layer
- Choose a layer configuration.
- One Image
- One Mosaicked Image
- Multiple Imagery Layers
- Define imagery raster type and add your imagery.
- Enter the title, tags, and description for your imagery layer.
- Click Save to create and publish the imagery layer.
The layer will now be available for use in maps and applications within the ArcGIS Online portal.
Tile layer tool
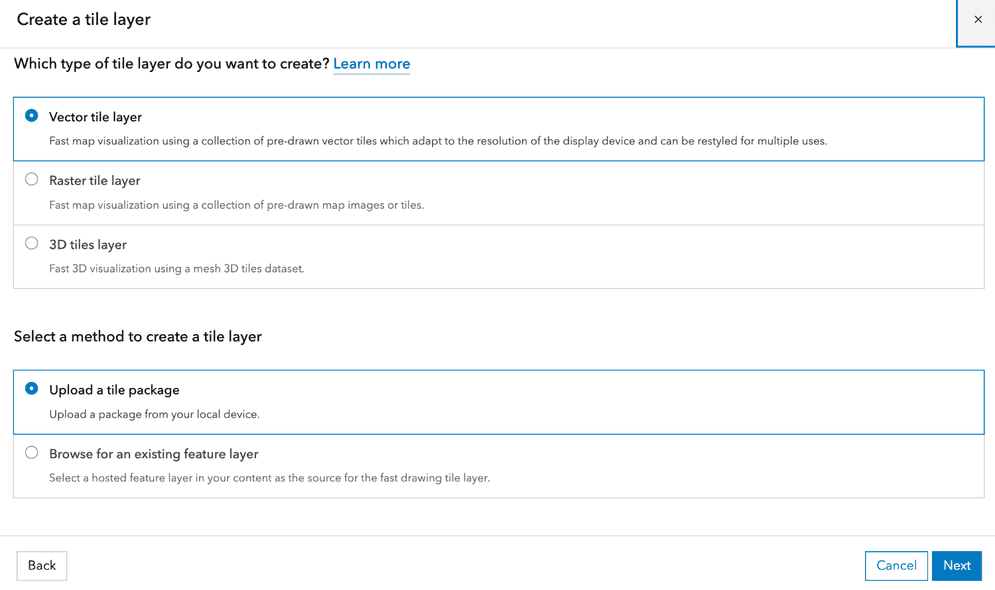
The tile layer tool allows you to create and publish tile layers from raster datasets or map tiles. This tool supports various input formats and enables users to define properties like tiling scheme, levels of detail, and spatial reference. Tile layers provide fast and efficient visualization of large datasets for basemaps and operational layers in web maps and applications.
You access the tile layer tool by creating a new item. The steps to use the tool are:
- Sign in to your portal.
- Click Content > My Content > New item.
- Select Tile Layer Choose the Tile Layer option from the available types of content you can create.
- Upload Your Data Drag and drop your raster dataset or map tile files into the designated area, or use the option to upload from cloud storage.
- Configure Layer Properties Define the tiling scheme, levels of detail, and spatial reference according to your requirements.
- Add Item Details Enter details such as the title, tags, and description to provide context for your tile layer.
- Save and Publish Click "Save" or "Add" to create and publish the tile layer. The layer will now be available for use in web maps and applications.
Data tools
The portal provides data tools to create content, enabling users to upload, manage, and visualize geographic information. Users can create new items by uploading various file formats, such as shapefiles, CSVs, and images, directly into the portal.
Import data tool
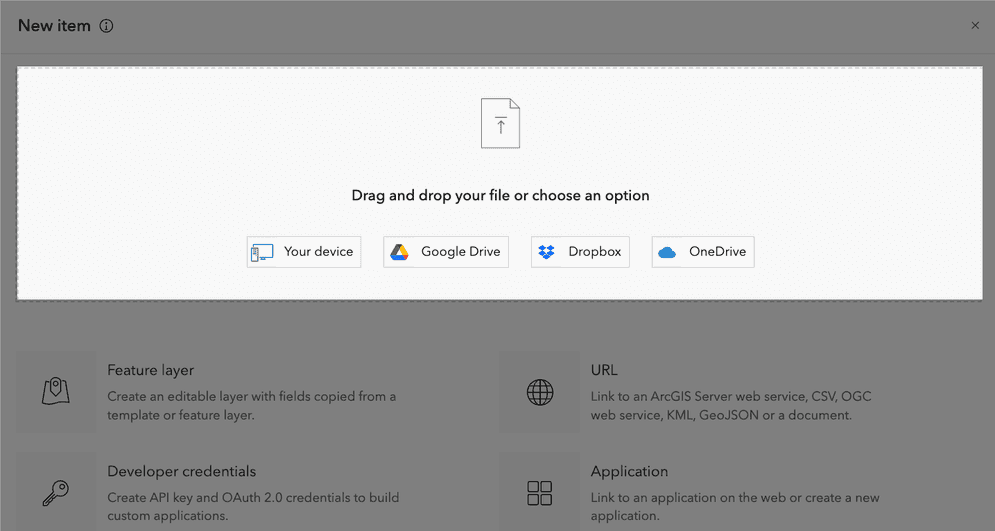
The import data tool in the New item dialog simplifies the process of creating new items in a portal. Users can upload files by dragging them from their computer and dropping them into the designated area in the dialog. This tool supports a variety of file formats, such as shapefiles, CSVs, and images, allowing for quick creation of new maps, layers, and other resources directly in the portal.
You access the import data tool by creating a new item. The steps to use the tool are:
- Sign in to your portal.
- Click Content > My Content > New item.
- Drag the file and drop the file into the designated area in the New Item dialog.
- Optionally, you can navigate to files on your computer or one of the supported cloud-based file hosting services.
- The system will automatically recognize the file type and prompt you to enter additional item details.
- Click Save to create the new item in the portal.
URL tool

The URL tool in the New item dialog allows users to create new items by linking to external resources via URLs. This tool supports the addition of various types of web content, such as web maps, web apps, and data services, by specifying their URLs. Users can define the item properties, including the title, tags, and description, to provide context and facilitate easy access.
You access the tile layer tool by creating a new item. The steps to use the tool are:
- Sign in to your portal.
- Click Content > My Content > New item.
- Choose the URL option.
- Provide the URL of the external web resource, such as a web map, web app, or data service.
- Enter details like the title, tags, and description for the linked resource.
- Click Save to create the item.
The linked resource will now be accessible in your portal.
Application tool
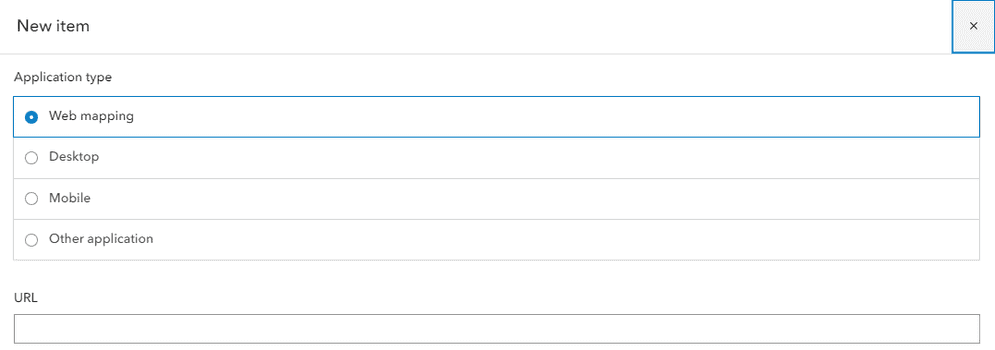
The application tool in the New item dialog allows users to create and publish various web applications. This tool supports different app templates and builders, enabling users to configure and customize apps to meet specific needs, such as data visualization, interactive mapping, or spatial analysis. Users can define properties like the app title, description, and tags to ensure proper categorization and easy access.
You access the application tool by creating a new item. The steps to use the tool are:
- Sign in to your portal.
- Click Content > My Content > New item.
- Choose the Application option.
- Select an Application type.
- Provide a url to your app in the URL.
- Provide the app title, tags, and description for the app item.
- Click Save to create and publish the application item.
The app will now be accessible in the portal.
Locator tool
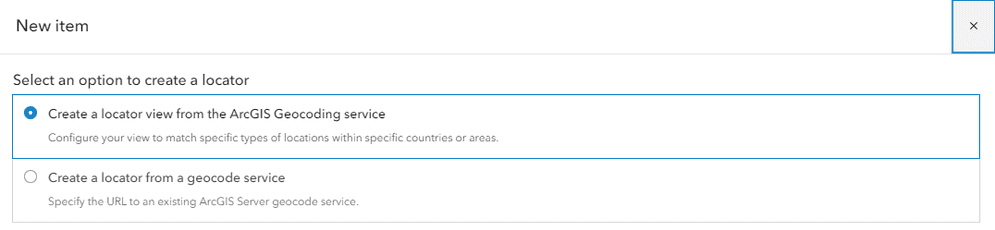
The locator tool in the New item dialog enables users to create and publish geocoding services. By uploading address data or using existing geospatial data, users can configure locator properties to facilitate address searches, batch geocoding, and reverse geocoding operations. This tool supports the creation of custom locators tailored to specific datasets and geographic areas, enhancing the ability to find and map locations within the ArcGIS Online environment.
You access the locator tool by creating a new item. The steps to use the tool are:
- Sign in to your portal.
- Click Content > My Content > New item.
- Choose the "Locator" option from the available types of content you can create.
- Upload your address data or select an existing dataset that you want to use for geocoding.
- Define the properties of the locator including the fields that contain address components and any other relevant settings.
- Enter details such as the title, tags, and description for your locator.
- Click Save to create and publish the locator.
The locator will now be available for use in geocoding operations in your portal.