What is portal administration?
Portal administration involves configuring the website, managing members, licensing applications, monitoring statuses, and managing geospatial content in your portal. To perform administrative tasks, you need to be an owner or administrator of your portal.
There are many types of administration tasks you can perform in a portal. As a developer, however, only a subset pertains to developing applications. The tasks you undertake also depend on the type of ArcGIS product you have and your administrative privileges.
This topic covers how to perform key developer administration tasks such as:
- Checking the status of Esri hosted services
- Allowing users to create API key and OAuth developer credentials
- Generating usage statistics and reports
- Changing user types and roles
- Determining when API keys are expiring
Types of administration
Portals have an Organization menu that allows you to perform many types of administration tasks.
Below is a list of the submenus and a summary of the tasks you can perform:
- Overview: Monitor and manage your subscription, storage, credits, and members. (ArcGIS Online only)
- Members: Manage user types and roles for other developers. (ArcGIS Online and ArcGIS Enterprise only)
- Licenses: Manage access to ArcGIS software and extensions.
- Status: View content, layer, service, and app usage. (ArcGIS Online only)
- Settings: View API key expiration dates, data hosting, and other portal settings.
Overview menu
The Overview menu provides a dashboard of the current state, resources available, and recent activity in your portal.
The menu can be used to:
- View and purchase additional credits.
- Edit settings for your organization.
- Invite new members to your organization.
- Manage add-on licenses.
See the examples below for tasks you can perform with the Overview menu.
View and purchase credits
The Overview menu allows you to view and manage credits your applications consume. Monitoring and managing credit usage is important to keep your applications running and to avoid unexpected service interruptions. Credits are used to access location services for basemaps, geocoding, and routing, for spatial analysis operations, and to store content and data. If your allotment of credits is low, you can purchase additional credits directly from the Overview menu in ArcGIS Online. To learn more about credits, go to Understand credits.
Follow these steps to purchase additional credits:
- Sign in to your portal.
- Go to Organization.
- Click Overview.
- Click Buy credits. You will be navigated to the ArcGIS Online Credits Pricing page.
- Click the number of credits you want to buy.
- Click Add to cart to complete the transaction.
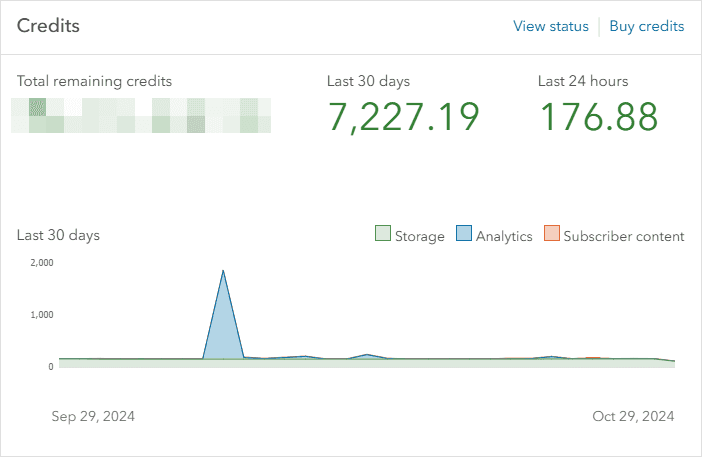
Below is an example of a credit section of the Overview menu displaying Total remaining credits, Last 30 days, and Last 24 hours.
Check the status of services
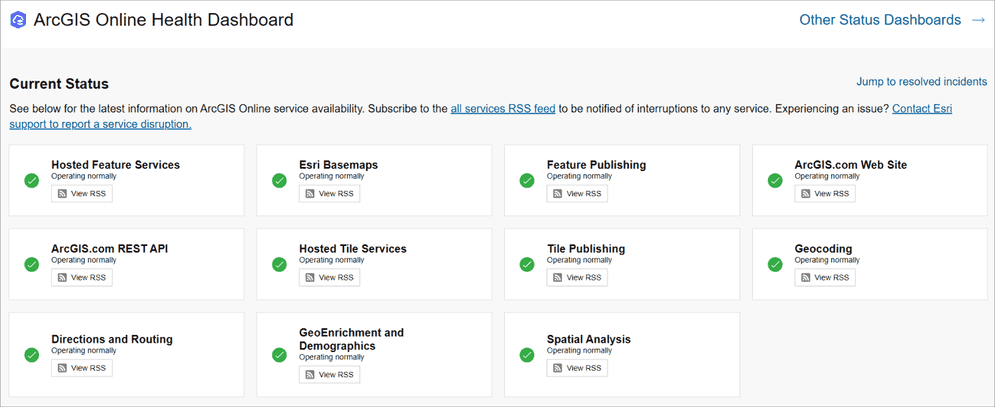
The Overview menu also allows you to view the status of the Esri hosted services such as location services and data services that your applications access. You can monitor their status through the ArcGIS Online Health Dashboard. This dashboard provides real-time updates on the operational status of these services. It also alerts you of any outages, scheduled maintenance, or service interruptions that may impact your apps.
Follow these steps to view the service availability dashboard:
- Sign in to your portal.
- Go to Organization.
- Click on Services health dashboard in your organization tile.
The ArcGIS Online Health Dashboard will be displayed in a new tab or window in your browser. Below is the dashboard displaying availability of services in ArcGIS Online.
Members menu
The Members menu allows you to manage user accounts and permissions within the organization.
The menu can be used to:
- Invite new members to your organization.
- Change roles for an existing user.
- Transfer content from one member to another.
- Manage members by disabling or deleting a member.
- Manage user types for a member.
See the examples below for tasks you can perform with the Members menu.
Enable privileges to create developer credentials
The Members menu allows you to add privileges to an ArcGIS account to create developer credentials. By granting these privileges, you allow users to create API keys and OAuth credentials that can be used to build applications to access ArcGIS services and data services in your portal. In most cases you create a custom role with the privileges and assign it to an account.
Follow these steps to create a custom developer role in your portal:
- Sign in to your portal.
- Go to Organization.
- Click Settings > Member roles > Create role.
- In the Create role tool, set these values:
- Role name:
Developer role - Description:
Custom developer role
- Role name:
- In the Role privileges in the Create role, enable these privileges:
- General privileges > Content > Generate API keys
- General privileges > Content > Assign privileges to OAuth 2.0 applications
- Click Save.
Follow these steps to assign the custom developer role to a user in your portal:
- Sign in to your portal.
- Go to Organization.
- Click Member.
- Click
...next to the member you want to manage. - Click Manage user type.
- Select Developer role from the Role drop-down list.
- Click Save.
With the developer role assigned to a user, they can now create API keys. Learn about creating API keys in the Create an API key tutorial.
Change user type and role for a member
The Members menu allows you to change a member's user type and role. This is important if you want to change the permissions of one or more members in your portal. For example, you may want to upgrade a member from a Viewer to an Editor or assign an administrative role for added access and control.
Follow these steps to change a user type or role for a member in your organization:
- Sign in to your portal.
- Go to Organization.
- Click Member.
- Click
...next to the member you want to manage. - Click Manage user type.
- Select User type from the drop-down list.
- Select Role from the drop-down list.
- Click Save.
Below is the Manage user type / role tool you use to change user types and roles for members in your portal.

Set credit limit for a member
The Members menu also allows you to manage credits in ArcGIS Online to prevent excessive usage. Setting a credit limit helps manage costs by controlling how many credits each member can use. This approach helps you avoid unexpected charges.
Follow these steps to change a user type or role for a member in your organization:
- Sign in to your portal.
- Go to Organization.
- Click Member.
- Click
...next to the member you want to manage. - Click Manage credits.
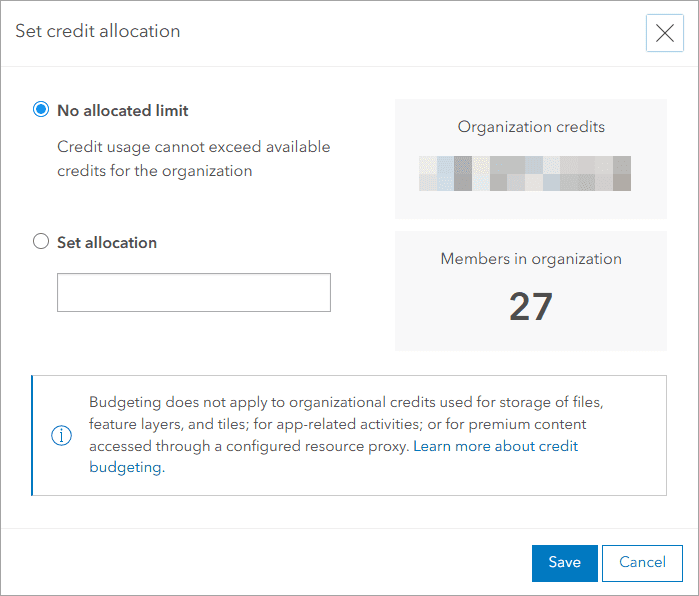
- In the Set credit allocation tool, set an allotment amount in the Set allocation.
- Click Save.
Below is the Set credit allocation tool that allows you to set a limit of credits for a member.
Transfer items from one member to another
The Members menu also allows you to transfer items, such as web maps, apps, or data, to a different user in the portal. This is often necessary when a team member changes roles or leaves the organization. As an administrator in your portal, you can easily reassign ownership of these items to another member to maintain access.
Follow these steps to transfer items from one member to another:
- Sign in to your portal.
- Go to Organization.
- Click Member.
- Click
...next to the member you want to manage. - Click Transfer content.
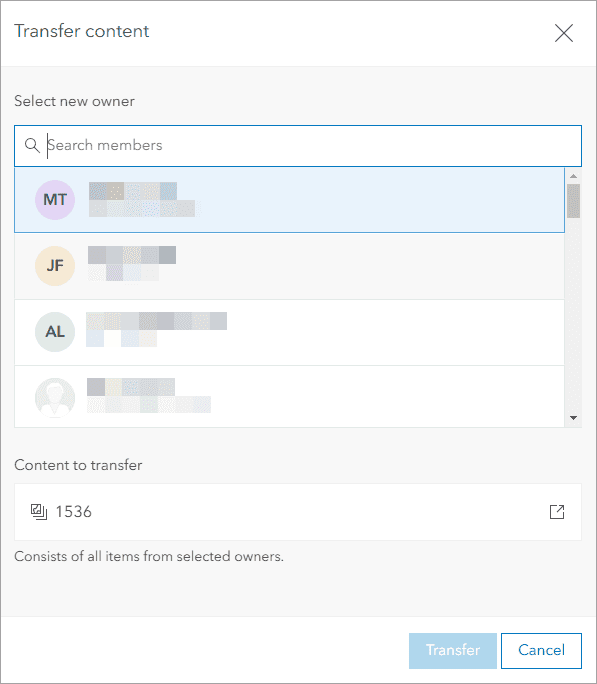
- In the Transfer content tool, select a user New owner.
- Click Transfer.
Below is the Transfer content tool that allows you transfer content items from one member to another.
Licenses menu
The Licenses menu allows you to manage licenses and extensions in your portal.
The menu can be used to:
- Manage licenses for different user types.
- Manage add-on licenses which provide additional functionality for a user.
- View assigned and available user types in the organization and compatible roles associated with each user type.
- Review extensions that can be enabled for your organization like premium content or apps.
See the examples below for tasks you can perform with the Licenses menu.
Enable ArcGIS app for a user
The Licenses menu allows you to enable applications and features in your portal. For example, ArcGIS Survey123 is an application builder for creating and managing custom surveys that collect data from the field or other sources. You can enable ArcGIS Survey123 for a member in your portal to allow them to access and use the app to design surveys, collect responses, and analyze results.
Follow these steps to transfer items from one member to another in your organization:
- Sign in to your portal.
- Go to Organization.
- Click Licenses.
- Click Manage for ArcGIS Survey123 in the Add-on licenses window.
- In the Manage: ArcGIS Survey123 window, click the toggle button next to the selected user.
- Optionally, you can inform the user of this added capability by clicking Email member.
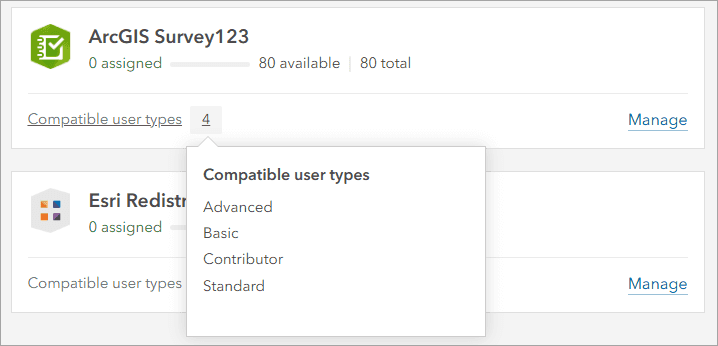
Below is an example list of compatible user types that are authorized to use ArcGIS Survey123 in a portal.
Status menu
The Status menu provides you with a view of your organization's operational health and performance metrics. Information in the menu is categorized by Dashboard and Reports.
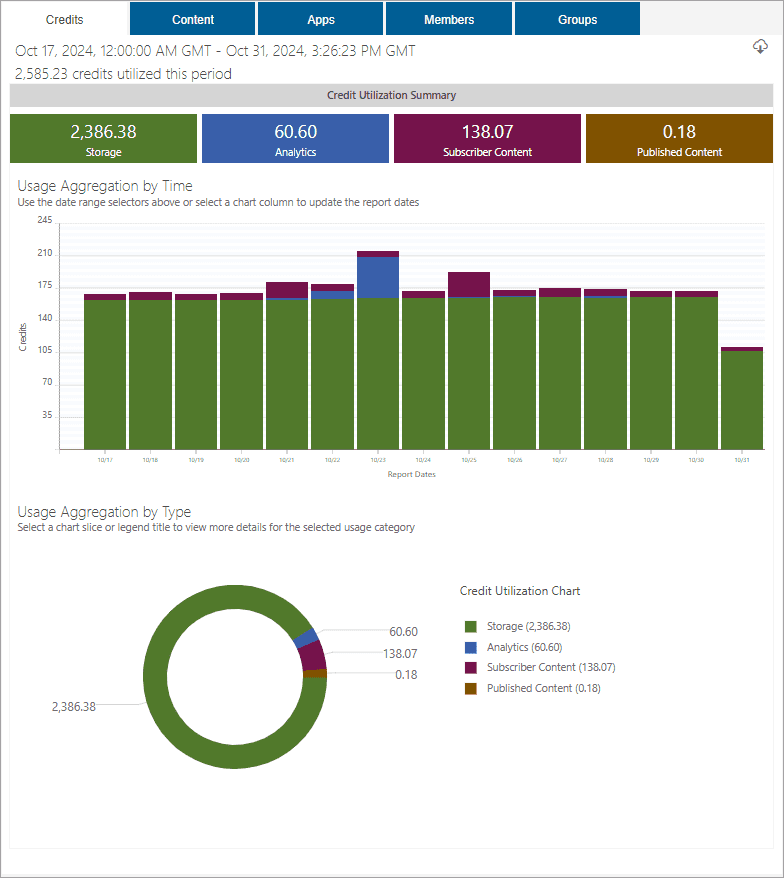
- Dashboard displays a summary of the organization that includes active users, content usage, and credit consumption. The dashboard is updated in real-time, providing you with the most current information about the organization's status. You have the option to customize the dashboard to focus on specific metrics that are most relevant.
- Reports provides detailed information about organization's usage and performance. Key features include usage reports, activity logs, and historical data.
See the examples below for tasks you can perform with the Status menu.
Get statistics on content items
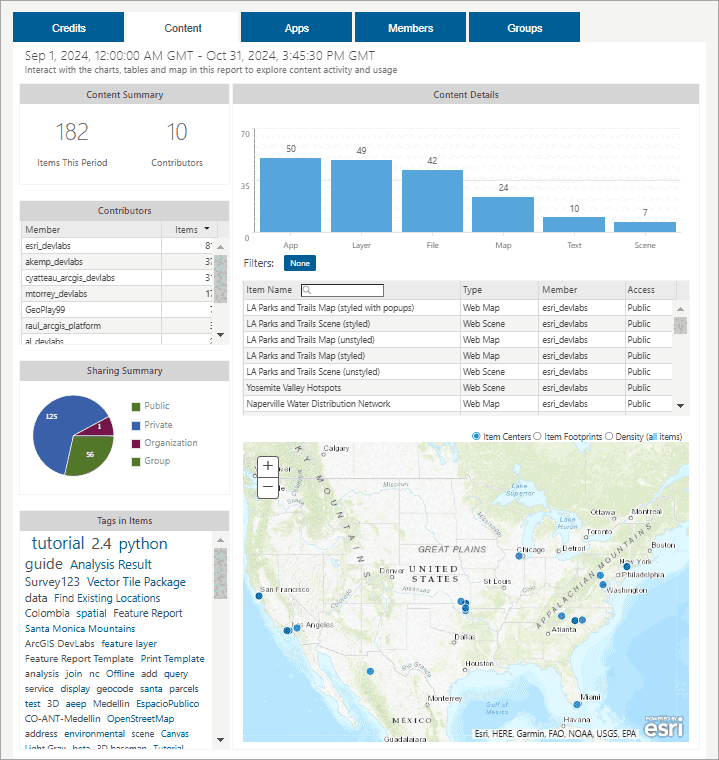
The Status menu allows you to access a dashboard to generate comprehensive reports and statistics on content items in your portal. The dashboard helps you monitor and analyze trends, provide insights into types of items such as maps, apps, and feature layers that users have created. By specifying a date range, you can view stats of items created, identify patterns in content development, and assess activity levels across your portal.
Follow these steps to generate a report of stats for the last 60 days:
- Sign in to your portal.
- Go to Organization.
- Click Status > Dashboard > Content.
- Click Quick Date Select > Last 60 days.
Below is an example virtual report displaying statistics for the last 60 days of content items in a portal.
Get data usage for each developer credential
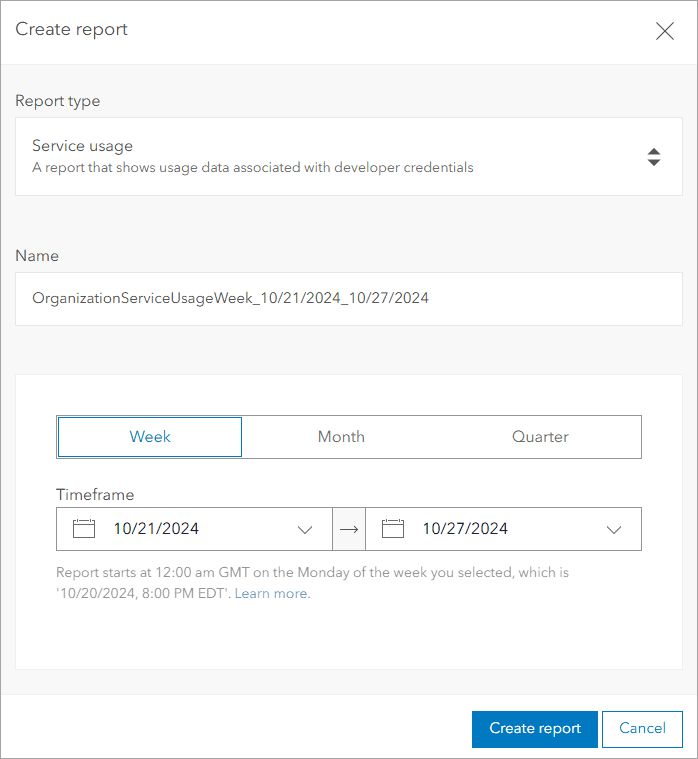
The Status menu allows you to monitor data usage for each developer credential to generate detailed insights. The tool enables you to view data consumption by individual developer credentials, helping you track API requests, data transfers, and other resource usage metrics. Using this report, you can quickly identify high-usage credentials, review activity levels, and understand how different developers are using resources.
Follow these steps to generate a report of service usage for a time period:
- Sign in to your portal.
- Go to Organization.
- Click Status > Reports > Create report > Single report.
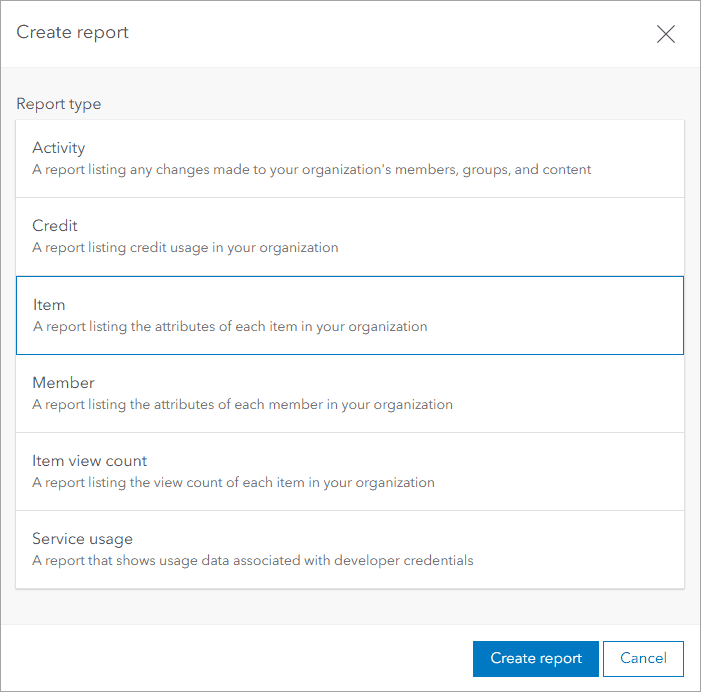
- In the Create report tool, click Service usage.
- Set a name for the report in the Name.
- Set the from and to date ranges in the Timeframe.
- Click Create report.
The report will be created as an item in your portal and will be added to the Reports list for your to download.
You use the Create report tool below to generate a report displaying the latest changes or service usage in a portal.
Settings menu
The Settings menu allows you to configure the default settings for your portal site.
The menu can be used to perform different categories of tasks:
- General: Configure the portal site such as the organization profile, navigation bar, contact link, and shared theme.
- Utility services: Configure the Printing, GeoEnrichment, Geocoding, and Directions and Routing services.
- Credits: Configure credit consumption. Control expenditures like storage, analytics, and use of premium content.
- Security: Change the privileges for member access by configuring settings such as sign-in policy, multifactor authentication, and apps.
See the examples below for tasks you can perform with the Settings menu.
View API keys and expiration dates
The Settings menu allows you to manage API keys in your portal. For example, you can use the tool to list all API keys to keep track of expiration dates and avoid unexpected disruptions in your applications.
Follow these steps to view API keys and expiration dates:
- Sign in to your portal.
- Go to Organization.
- Click Settings > Security > Developer credentials.
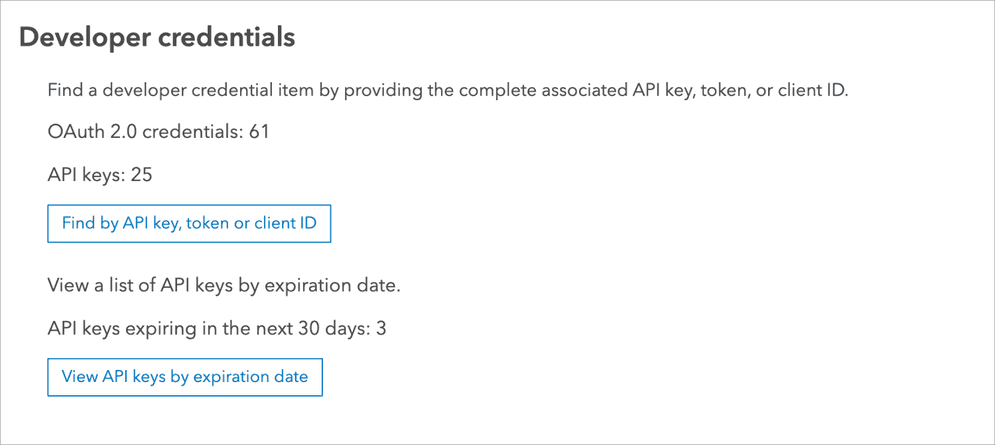
- Click View API keys by expiration date.
List of API keys will be listed in a modal window sorted by Most recent by default.
You use the Find by API key token or client ID or View API keys by expiration date to view the current state of API keys so you can plan renewals, manage dependencies, and avoid disruptions on development projects.
Configure Home page
The Settings menu allows you to manage the Home page which is a web page to showcase important maps, apps, layers, and other resources in your portal.
Use the settings to configure the following:
- Design: Configure the home page to reflect your portal's branding, mission, and important content such as setting a header with title, logo, and cover image.
- Content Blocks: The home page consists of customizable content blocks such as item galleries to showcase featured maps, apps, layers from specific groups.
- Item Galleries: Display thumbnails of your portal's featured content like maps, apps, scenes, layers, etc. Configure to show all or only items from a specific curated group.
Below is an example of the Home page for an organization that can be configured.

Configure Gallery items
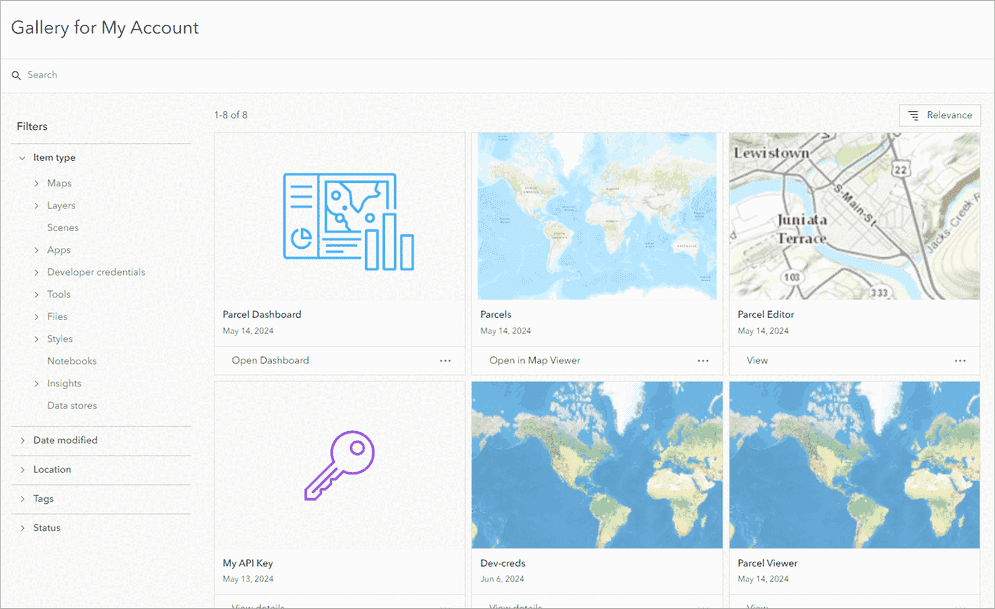
The Settings menu allows you to manage the Gallery page which is a web page to showcase and provide easy access to your portal's most important maps, apps, layers, and other geospatial content items.
Use the settings to configure the following:
- Item Gallery: Display thumbnails of featured content items such as maps, apps, scenes, and layers. Choose to show all items in your portal or only those from a specific group.
- Filtering and Sorting: Filter items by type, sorting by attributes such as date modified, title, and relevance. If a group is used, its featured content order is respected.
- Group Integration: Configure display items from a specific group, allowing group owners to curate the featured content.
Below is an example of a Gallery page displaying thumbnails of content in an portal.
Configure Map viewer capabilities
The Settings menu allows you to configure which basemaps, configurable apps, and analysis layers to use when users create maps, scenes, and apps.
Use the settings to configure the following:
- Primary map viewer: Choose between Map Viewer or Map Viewer Classic as your default map tool.
- Basemap gallery: Select the group of basemaps as your default basemap gallery that will be available in Map Viewer or Scene Viewer.
- Configurable apps: Choose a group of that contains configurable apps you only want in the apps gallery.
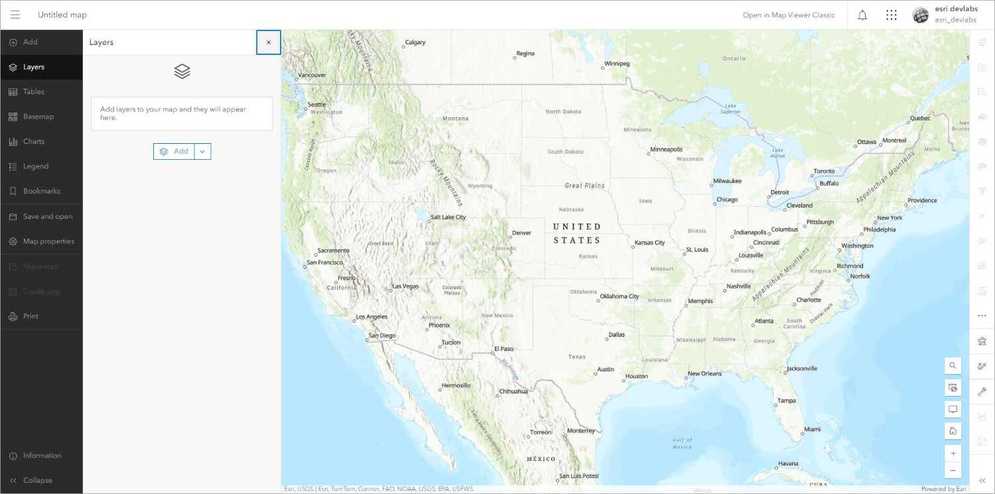
Below is an example of the Map Viewer displaying a topographic basemap (as the default basemap).
Configure Item details and settings
The Settings menu allows you to manage how items are displayed in Contents.
Use the settings to configure the following:
- Comments: Enable or disable comments in the item page of each item.
- Categories: Create categories to better organize your content items.
- Recycle bin: Enable or disable the use of the recycle bin functionality where deleted items can be held for 14 days before being permanently deleted.
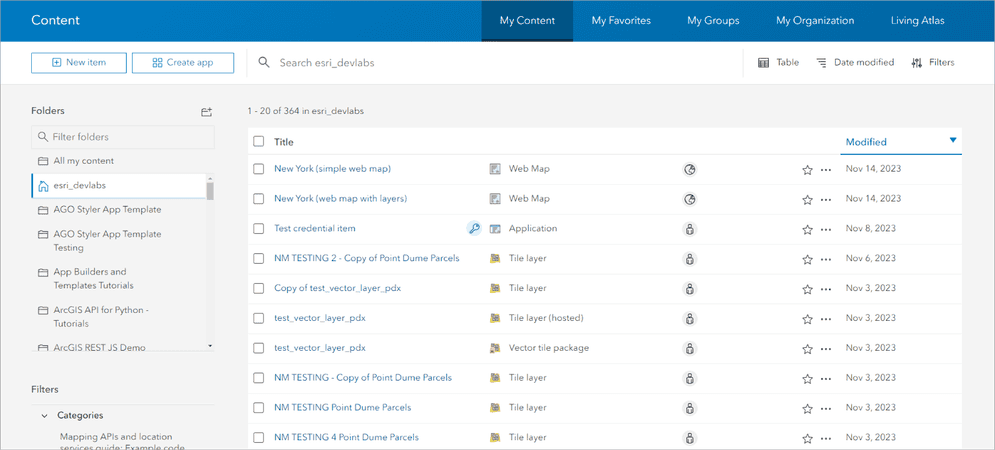
Below is an example of content items displayed in a portal.
Configure Groups settings
The Settings menu allows you to configure Groups which is a web page for users to discover, join, create, and manage groups.
Use the settings to configure the following:
- Searching groups: Search for groups by name, description, tags, or other metadata. Apply filters like group type, category, and owner to refine your search.
- Joining groups: Request to join public or organization groups. For private groups, the group owner must invite the user.
- Creating new groups: Create new groups and specify settings like group type, summary, and tags. Group types include Public, Organization, and Private.
- Managing group membership: Search for members, filter by criteria like member role, and bulk add/remove members. Group owners can add or remove members.
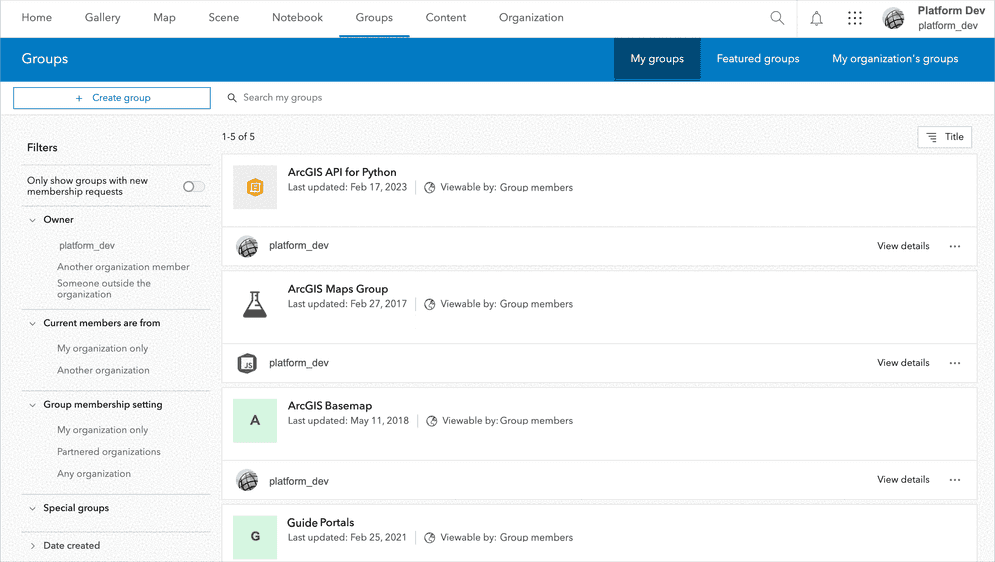
Below is an example of a Groups page displaying available groups to join in an organization. To learn more about groups, go to Manage groups.
