API keys (legacy) are permanent access tokens created before June 2024. They can no longer be created or managed, and have been replaced by API key credentials. All developers should replace their existing API keys (legacy) with new API keys from API key credentials.
This tutorial shows how to migrate your application from an API key (legacy) to an API key from API key credentials and preserve the same privileges and item access.
Prerequisites
-
You need an ArcGIS Location Platform account, ArcGIS Online account, or an ArcGIS Enterprise account. To create API keys, ArcGIS Online and ArcGIS Enterprise accounts must have administrator access or a custom role with the correct privileges.
-
You need to know the privileges to assign to your API key. The privileges assigned allow your application to access specific ArcGIS services and resources.
Steps
Sign in to your portal
Check the scopes of your API key (legacy)
API keys (legacy) can only be scoped to access location services. These capabilities and more are available through API key credentials. Use your portal to check the service scopes of your API key (legacy) to create a new set of credentials with equivalent capabilities.
- Go to Content > My content.
- Click on the API key (legacy) item you want to replace. The item should have the label API key (legacy). You will then be redirected to the item page of your API key (legacy) item.

- Under Credentials, click Manage.
- In API key (legacy), scroll down to the Location services section.
- Write down the selected scopes under Required service and Available services. These scopes will be replicated in your API key credentials using privileges.
Create API key credentials
Set the expiration date and referrers
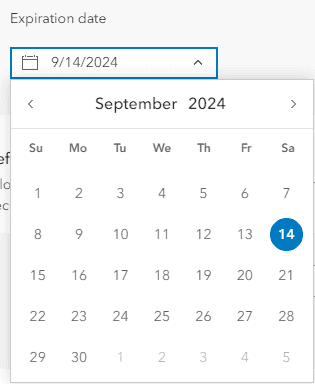
API key credentials generate long-lived access tokens called API keys. API keys are valid for up to one year, and their expiration date is set when they are generated. You can also set referrers on an API key, which restrict the key to only be usable from authorized domains.
-
In the Create developer credentials window, click on the Expiration date field. Set the expiration date of the access token to one month from today's date.
-
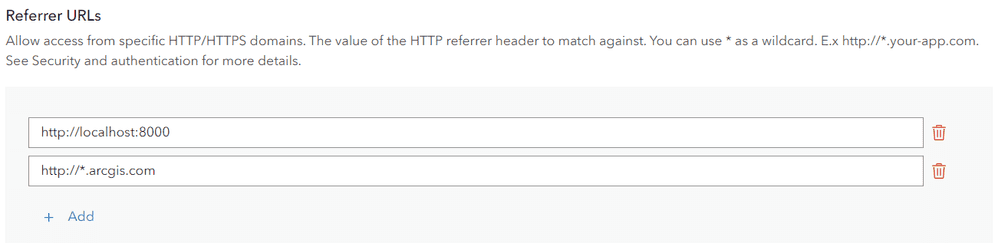
Set the Referrers field to the web domains you would like to restrict the access token to. This is highly recommended for security purposes. To learn more about referrers, go to API key credentials.
-
Click Next.
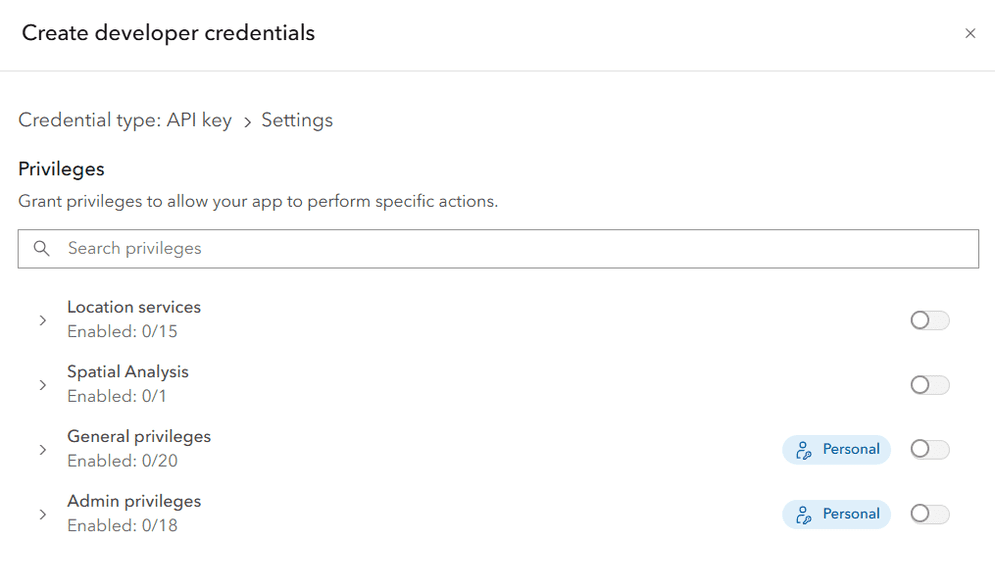
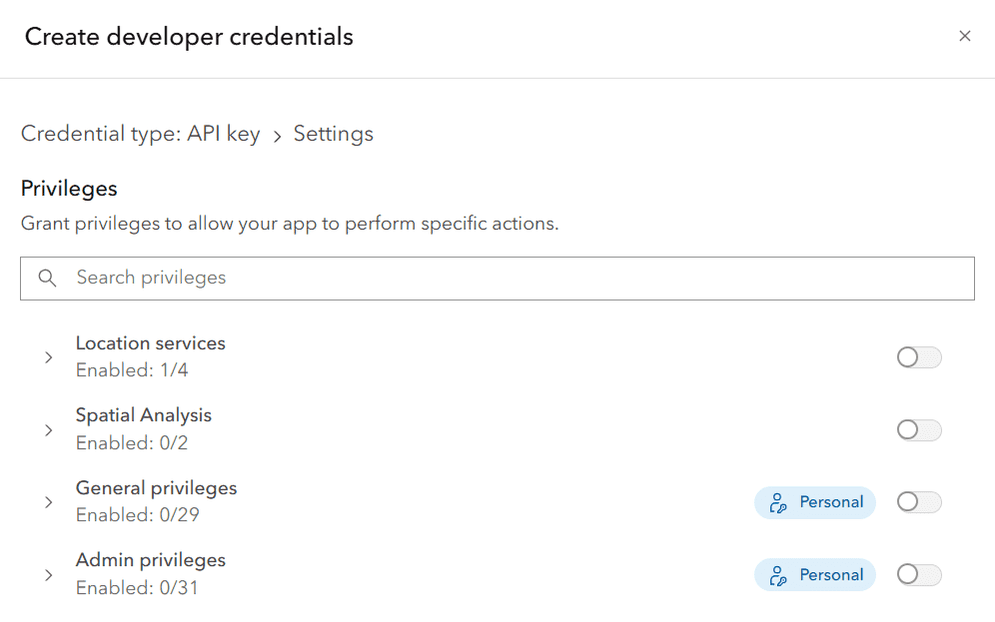
Select privileges
You can configure the settings of API key credentials to configure the privileges of access tokens. For an access token to work in your application, it needs to have the correct privileges to access the content and services your app is using. Select privileges for your API key credentials that mimic the scopes of your original API key (legacy).
Select items (optional)
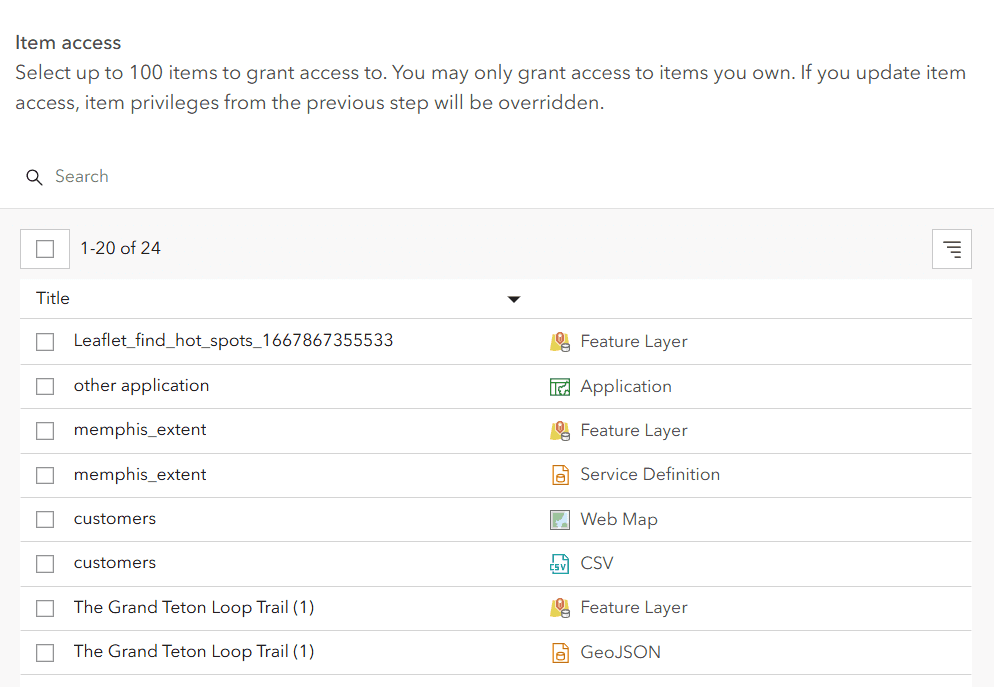
If your application will require access to specific private items, you will need to configure your developer credentials to access them. The Item access menu allows you to browse your portal's content and grant your API key access to specific items.
-
If your token does not require item access, click Skip.
-
In the Grant item access window, click Browse items.

-
Select the items you want to grant access to. You can select up to 100 items in this menu.
-
Click Add items.
Save the item
After configuring the properties of your API key credentials, you can save the credentials as a new item.
-
In the Create developer credentials window, set the following properties:
- Title:
My API key credentials - Folder:
Developer credentials(Create a new folder) - Tags: Add tags related to the privileges of the credentials.
- Description: Describe the application that these developer credentials will be used in.
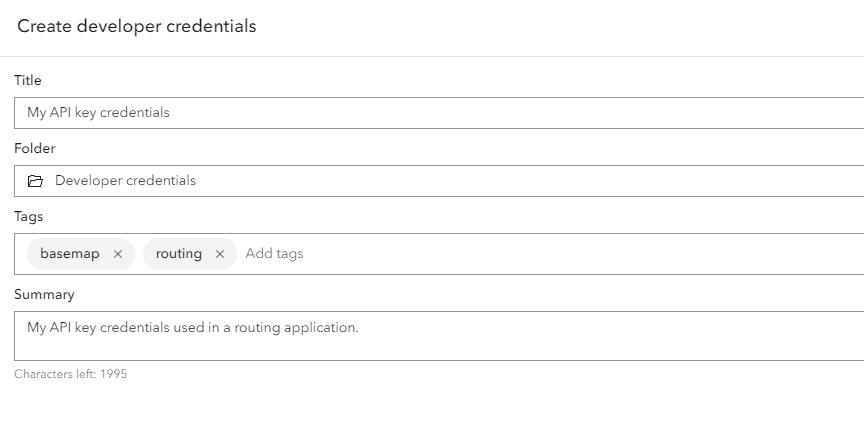
Click Next.
- Title:
-
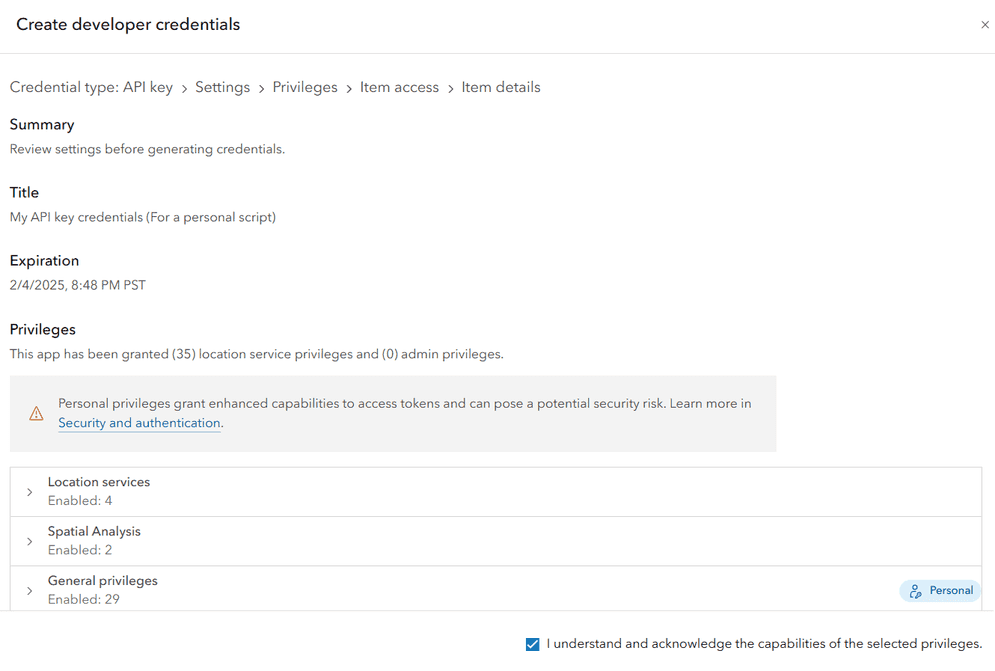
In the Summary window, review the properties, privileges, and item access you have set. If you selected any privileges with a personal scope, you must acknowledge the security implications before moving forward.
-
Click Next.
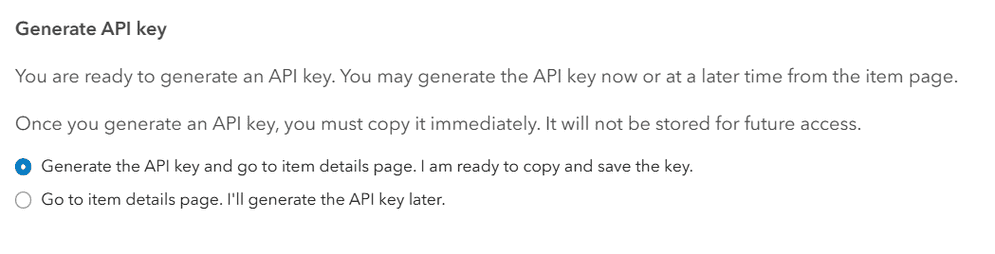
Copy the API key
-
In the Create developer credentials > Generate API key window, select Generate the API key and go to item details page. I am ready to copy and save the key.
-
Click Next.
-
Copy the API key from the window that appears and paste it into your application.

Delete the API key (legacy)
Once you replace your API key (legacy) in your application with your new API key, you can safely delete the API key (legacy) item.
- Go to Content > My content.
- Click on the API key (legacy) item you want to delete. You will then be redirected to the item page of your API key (legacy) item.
- Click on the Settings tab.
- In General, click Delete Item > Delete.
What's next?
Learn how to use your API key to access secure ArcGIS resources in the following guides: