Add a vector tile layer

Learn how to add a vector tile layer to a map.

Add a vector tile layer using API key authentication

A vector tile layer is a hosted data layer with vector tile data. You can create a vector tile layer by publishing your data with data management tools.

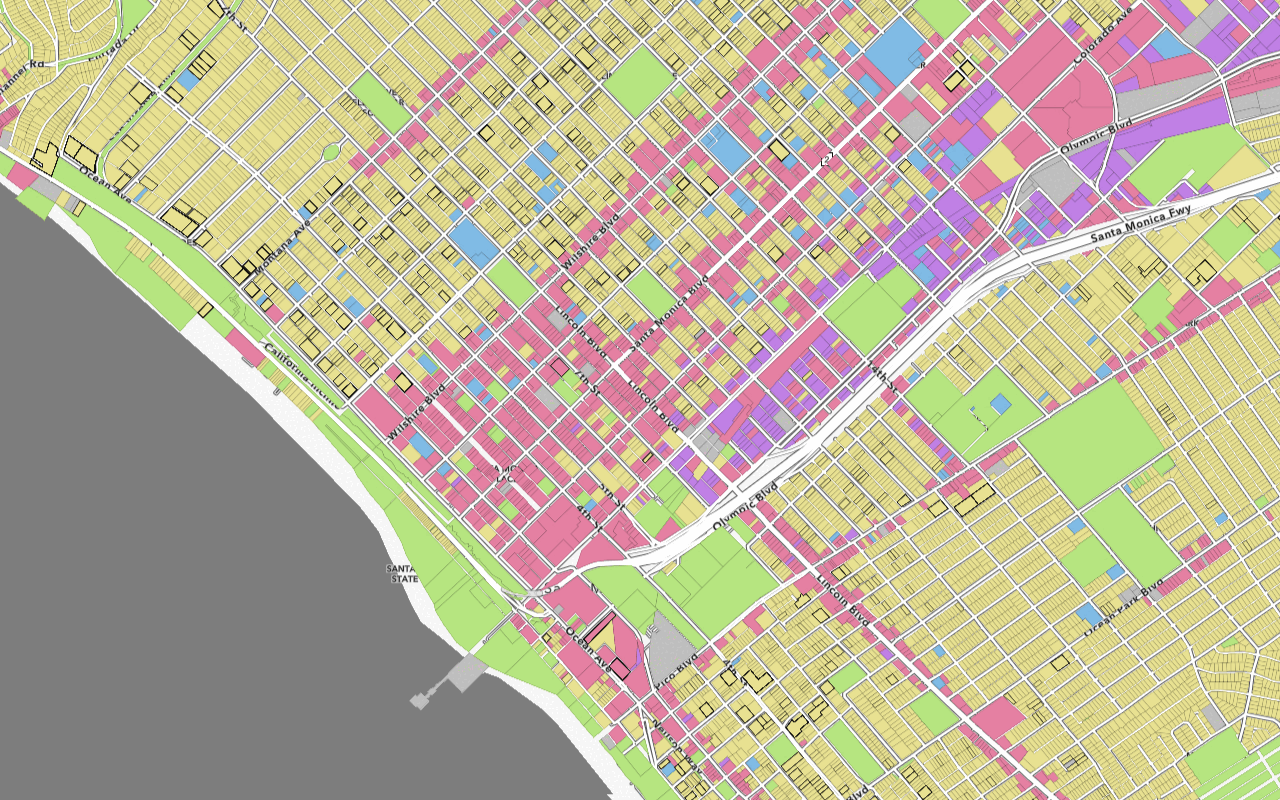
In this tutorial, you display a parcels layer from a public vector tile service with its default styling.

Prerequisites

Steps

Get the starter app

Select a type of authentication below and follow the steps to create a new application.

You can choose one of the following to create a new CodePen:

  • Option 1: Complete the Display a map tutorial; or,
  • Option 2: Start from the Display a map tutorial .

Set up authentication

Create developer credentials in your portal for the type of authentication you selected.

Create a new API key credential with privileges to access the resources used in this tutorial.

  1. Go to the Create an API key tutorial and create an API key with the following privilege(s):
    • Privileges
      • Location services > Basemaps
    • Item access
      • Note: If you are using your own custom data layer for this tutorial, you need to grant the API key credentials access to the layer item. Learn more in Item access privileges.
  2. When prompted, copy and paste the API key to a safe location. It will be used in the next step.

Set developer credentials

Use the API key or OAuth developer credentials so your application can access location services.

  1. Update the accessToken variable to use your API key.

    Use dark colors for code blocks
    1
    2
    3
    4
    5
    6
    7
    8
    9
    10
    11
    12
    13
    14
    15
    16
    17
    18
    19
    20
    21
    22
    23
    24
    25
    26
    27
    28
    29
    30
    31
    32
    33
    34
    35
    36
    37
    38
    39
    40
    41
    42
    43
    44
    45
    46
    47
    48
    49
    50
    51
    52
    53
    54
    55
    56
    57
    58
    59
    60
    61
    62
    63
    64
    65
    66
    67
    68
    69
    70
    71
    72
    73
    74
    75
    76
      <script>
    
        /* Use for API key authentication */
        const accessToken = "YOUR_ACCESS_TOKEN";
    
        const map = L.map("map", {
          minZoom: 2
        })
    
        map.setView([34.02, -118.805], 13);
    
        const basemapEnum = "arcgis/streets";
    
        L.esri.Vector.vectorBasemapLayer(basemapEnum, {
          token: accessToken
        }).addTo(map);
    
      </script>
    

Add a vector tile layer

To access the vector tile service, you use the vectorTileLayer class.

  1. Create a vectorTileLayer and set the url of the layer before adding it to the map.

    Expand
    Use dark colors for code blocks
    1
    2
    3
    4
    5
    6
    7
    8
    9
    10
    11
    12
    13
    14
    15
    16
    17
    18
    19
    20
    21
    22
    23
    24
    25
    26
    27
    28
    29
    30
    31
    32
    33
    34
    35
    36
    37
    38
    39
    40
    41
    42
    43
    44
    45
    46
    47
    48
    49
    50
    51
    52
    53
    54
    55
    56
    57
    58
    59
    60
    61
    62
    63
    64
    65
    66
    67
    68
    69
    70
    71
    72
    73
        L.esri.Vector.vectorBasemapLayer(basemapEnum, {
          token: accessToken
        }).addTo(map);
    
        L.esri.Vector.vectorTileLayer(
          "https://vectortileservices3.arcgis.com/GVgbJbqm8hXASVYi/arcgis/rest/services/Santa_Monica_Mountains_Parcels_VTL/VectorTileServer"
        ).addTo(map);
    
      </script>
    
    Expand

Run the app

Run the app.

You should see the vector tile layer with parcels displayed on the basemap layer.

What's next?

Learn how to use additional ArcGIS location services in these tutorials:
Your browser is no longer supported. Please upgrade your browser for the best experience. See our browser deprecation post for more details.