Install
The developer edition of ArcGIS Experience Builder supports ArcGIS Online and ArcGIS Enterprise 10.6 and later. There are two services for extending Experience Builder, the server and the client. You will need to have both services running to have your updates load in Experience Builder. To install the developer edition of Experience Builder, complete the following steps for the server install and client install.
If you need to install Experience Builder without an internet connection, complete the offline install steps.
Server install
Create Client ID using ArcGIS Online or ArcGIS Enterprise
Use these steps if you're using ArcGIS Online or ArcGIS Enterprise.
-
Experience Builder uses Node.js. Check the recommended Node version for the version of Experience Builder you are using, then download and install that version of Node.js for your operating system.
-
Download the developer edition of Experience Builder and unzip it on your local drive.
-
Log in to your ArcGIS Online or ArcGIS Enterprise portal and go to
My Contenttab of the content page, clickNew Item, and selectApplication. -
Select
Other applicationoption and clickNext. -
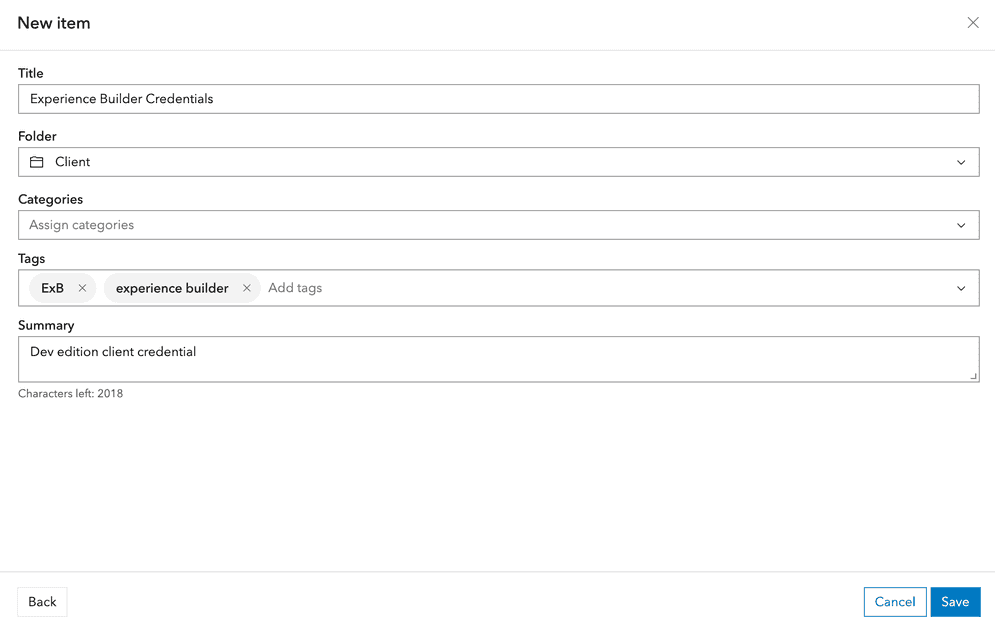
In the New item dialog box, enter the following parameters:
-
Title- Enter something that makes sense to you, such asExperience Builder credentials. -
Tags- Optionally enter something such asExperience Builder. -
Select a folder and optionally fill
CategoriesandSummaryif necessary -
Click
Saveto add
-
-
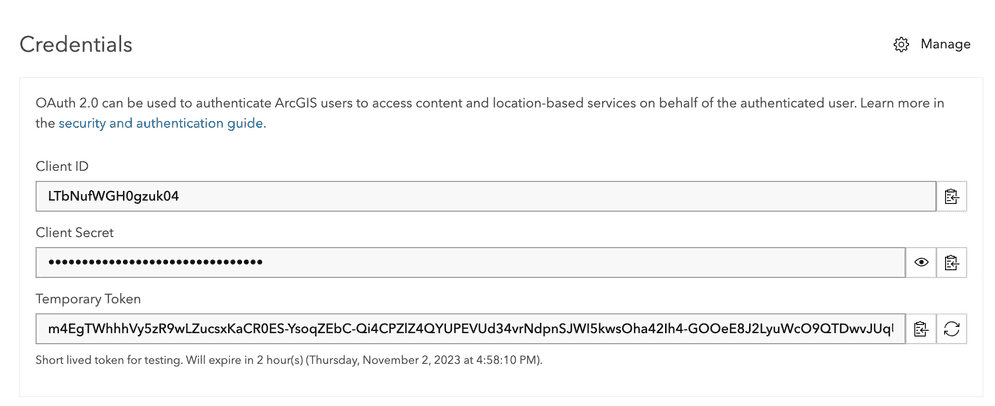
Click the
Managebutton at theCredentialssection.
-
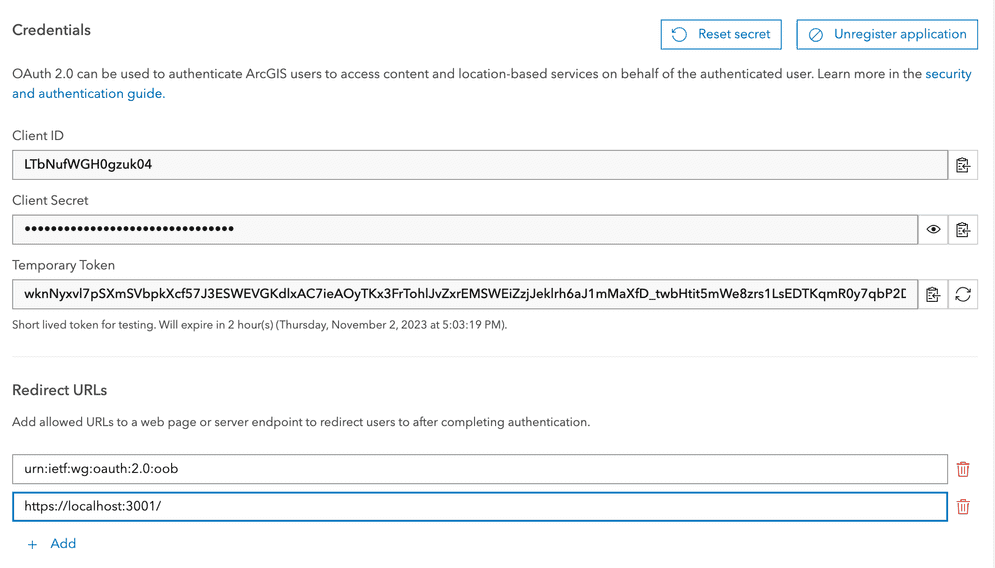
On the
Redirect URIsection, clickAddto enterhttps. Copy the://localhost :3001/ App IDatCredentialsection.
-
Open a command prompt or terminal window, cd to the /server directory of the Experience Builder installation, type
npm ci, and hit enter to install the necessary modules. -
Type
npm startto start the service. -
Open Experience Builder at the following URL
httpsin your browser.://localhost :3001/ -
Specify the URL to your ArcGIS Online or ArcGIS Enterprise organization, and add your
App IDfor the Client ID > Sign in. -
Install the client.
Client install
To develop with Experience Builder, a service must be installed to launch webpack to help with bundling and loading your custom widgets and themes used in your local Experience Builder.
-
Open a command prompt or terminal window, cd to the /client directory of the Experience Builder installation, type
npm ci, and hit enter to install the necessary modules. -
Type
npm startto start the service.
You can have multiple versions of the developer edition of Experience Builder on the same machine. Please check that your machine meets the System requirements.
Offline install
-
In a disconnected environment you will not have access to the ArcGIS API JavaScript (JSAPI) CDN. In this scenario, you will be required to download the JSAPI and install it locally.
-
Experience Builder uses Node.js. Check the recommended Node version for the version of Experience Builder you are using, then download and install that version of Node.js for your operating system.
-
Download the developer edition of Experience Builder and unzip it on your local drive.
-
Download the npm-cache zip for the developer edition of Experience Builder and unzip it on your local drive.
-
Open your user folder
(e.g., Windows Oin a command prompt or terminalS c :\ Users\exbuser) (e.g., mac. TypeO S / Users/install Ex B) npm config get cacheand press Enter key. A folder path of will be returned. -
Copy the returned folder path of the npm cache and open that directory in Windows Explorer or Finder.
-
Copy and paste the downloaded npm-cache files (from step 4) into the directory you got in step 6.
-
Open a command prompt or terminal window, cd to the /client directory of the Experience Builder installation, type
npm install --offline, and hit enter. -
Open another command prompt or terminal window, cd to the /server directory of the Experience Builder installation, type
npm install --offline, and hit enter. -
Open the client directory for your Experience Builder at the following path
<install folder.>/client/dist -
There are four places you will need to update the variable
arcgiswith your local JSAPI host URL. For example, replaceJs Api Url var arcgiswithJs Api Url = 'https ://js.arcgis.com/4.31/' var arcgisin each of the files below:Js Api Url = 'https ://exb.esri.com/4.31/' <install folder>/client/dist/index.html <install folder>/client/dist/experience/index.html <install folder>/client/dist/template/index.html <install folder>/client/dist/builder/index.html
-
Open a command prompt or terminal window, cd to the /client directory of the Experience Builder installation, and type
npm startto start the client service. -
Open a command prompt or terminal window, cd to the /server directory of the Experience Builder installation, and type
npm startto start the server service. -
Log in to your ArcGIS Online or ArcGIS Enterprise portal and go to
My Contenttab of the content page, clickNew Item, and selectApplication. -
Select
Other applicationoption and clickNext. -
In the New item dialog box, enter the following parameters:
Title- Enter something that makes sense to you, such asExperience Builder credentials.Tags- Optionally enter something such asExperience Builder.- Select a folder and optionally fill
CategoriesandSummaryif necessary - Click
Saveto add

-
Click the
Settingstab. Scroll down to theApp Registrationsection and clickUpdate. -
On the
Register Infodialog box as shown below, enter inhttpsfor the://localhost :3001/ Redirect URI, and clickAdd>Update. Copy theApp ID. -
Open Experience Builder at the following URL
httpsin your browser.://localhost :3001/ -
Specify the URL to your ArcGIS Online or ArcGIS Enterprise organization and add your
App IDfor the Client ID > Sign in.
Install as a Windows Service
- Download and install the latest Node.js LTS version for your operating system.
- Open Windows command prompt as administrator.
- Change the directory (
cd) to the/serverdirectory of Experience Builder. - Run the command
npm cito install the dependencies. - Run the command
npm run install-windows-service. - Open the Windows Services app and start the Experience Builder service (default name:
exb-server). - To remove the Experience Builder service, run the command
npm run uninstall-windows-service.