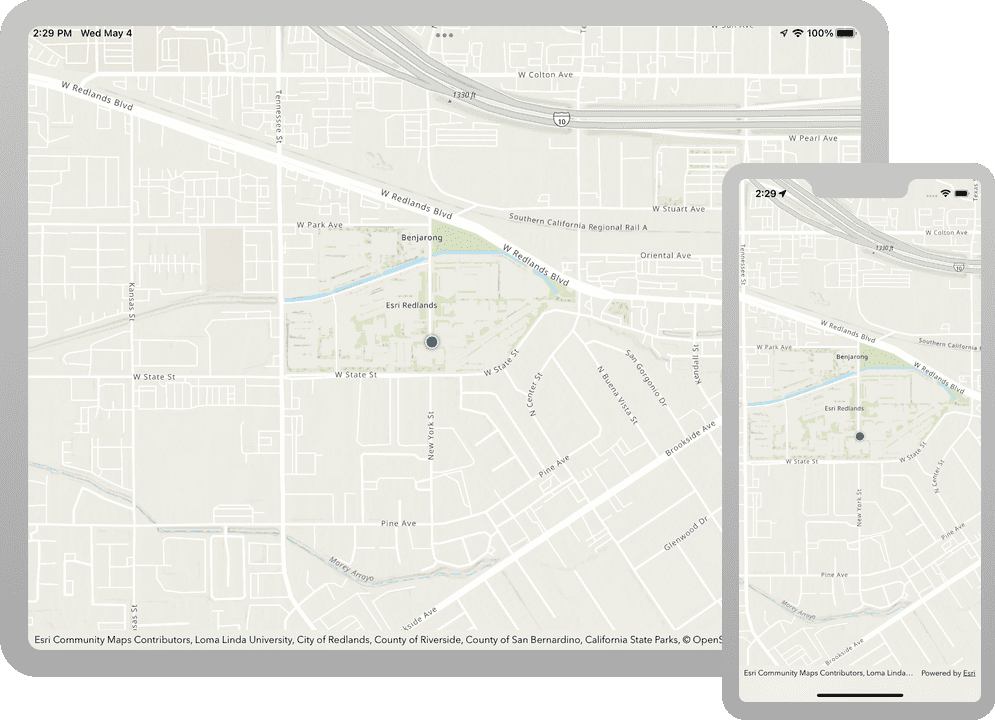
Learn how to display the current device location on a map or scene.

You can display the device location on a map or scene. This is important for workflows that require the user's current location, such as finding nearby businesses, navigating from the current location, or identifying and collecting geospatial information.
By default, location display uses the device's location provider. Your app can also process input from other location providers, such as an external GPS receiver or a provider that returns a simulated location. For more information, see the Show device location topic.
Prerequisites
Before starting this tutorial:
-
You need an ArcGIS Location Platform or ArcGIS Online account.
-
Your system meets the system requirements.
Steps
Open the Xcode project
-
To start the tutorial, complete the Display a map tutorial or download and unzip the solution.
-
Open the
.xcodeprojfile in Xcode. -
If you downloaded the solution, get an access token and set the API key.
An API Key gives your app access to secure resources used in this tutorial.
-
Go to the Create an API key tutorial to obtain a new API key access token using your ArcGIS Location Platform or ArcGIS Online account. Ensure that the following privilege is enabled: Location services > Basemaps > Basemap styles service. Copy the access token as it will be used in the next step.
-
In Xcode, in the Project Navigator, click AppDelegate.swift.
-
In the editor, set the
APIproperty on theKey AGSwith your access token.ArcGIS Runtime Environment AppDelegate.swiftUse dark colors for code blocks func application(_ application: UIApplication, didFinishLaunchingWithOptions launchOptions: [UIApplication.LaunchOptionsKey: Any]?) -> Bool { AGSArcGISRuntimeEnvironment.apiKey = "YOUR_ACCESS_TOKEN" return true }
-
Request user authorization to use location
The app must request authorization from the user to access the device location. The user can grant or deny the request.
-
In Xcode, in the Project Navigator, click Info.plist.
-
Add key
NSof typeLocation When In Use Usage Description String. Add a string value describing how the app would use the device location. For example, "To show your location on map"To learn more about requesting user authorization, see the Note in the Location data sources section of the Device location guide topic.
Show the current location
A map view provides
AGSLocationDisplay
for showing the current location of the device. The location symbol is displayed on top of all content in the map view.
Instances of this class manage the display of device location on a map view: the symbols, animation, auto pan behavior, and so on. Location display is an overlay of the map view, and displays above everything else, including graphics overlays.
The location display does not retrieve location information, that is the job of the associated data source, which provides location updates on a regular basis. In addition to the default system location data source, you can use location providers based on external GPS devices or a simulated location source.
Each map view has its own instance of a location display and instances of location display and location data source are not shared by multiple map views. This allows you to start and stop location display independently on multiple map views without affecting each other.
-
In Xcode, in the Project Navigator, click ViewController.swift.
-
In the editor, remove code from
setupmethod that sets the map's initial viewpoint. The map will zoom to the extent of the current location, so this code is no longer needed.Map() ViewController.swiftUse dark colors for code blocks mapView.setViewpoint( AGSViewpoint( latitude: 34.02700, longitude: -118.80500, scale: 72_000 ) ) -
Add code to start
AGSLocationDisplayfor the map view and assign aAGSLocationDisplayAutoPanModeto center the map at the device location.ViewController.swiftUse dark colors for code blocks self.mapView.locationDisplay.start {[weak self] error in guard let self = self else {return} if let error = error { print(error.localizedDescription) return } self.mapView.locationDisplay.autoPanMode = .recenter }
Run the app
-
Press Command + R to run the app.
If you are using the Xcode simulator your system must meet these minimum requirements: macOS Big Sur 11.3, Xcode 13, iOS 13. If you are using a physical device, then refer to the system requirements.
-
When the app runs, you'll see the system prompt requesting to use the device location. Tap to either Allow once or While using the app.
-
If the app is running on a simulator, you'll have to provide a simulated location. Go to the Features menu of the Simulator. Under Location, choose a predefined option or enter a custom Location.
Your map should now show the device's location, either simulated or actual.
What's next?
Learn how to use additional API features, ArcGIS location services, and ArcGIS tools in these tutorials: