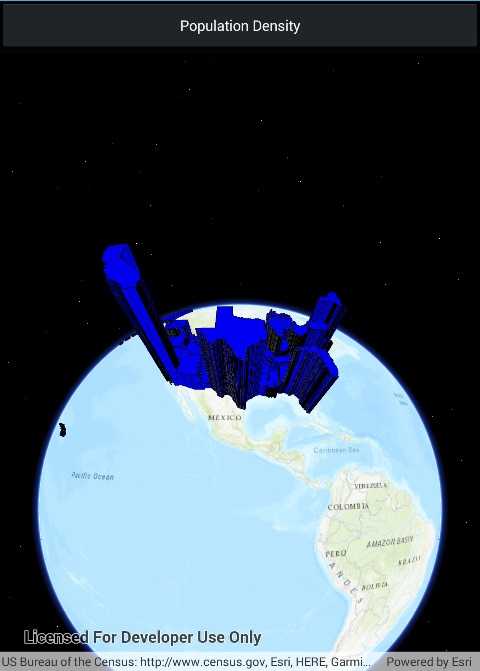
Extrude features based on their attributes.

Use case
Extrusion is the process of stretching a flat, 2D shape vertically to create a 3D object in a scene. For example, you can extrude building polygons by a height value to create three-dimensional building shapes.
How to use the sample
Press the button to switch between using population density and total population for extrusion. Higher extrusion directly corresponds to higher attribute values.
How it works
- Create a
ServiceFeatureTablefrom a URL. - Create a feature layer from the service feature table.
- Make sure to set the rendering mode to dynamic.
- Apply a
SimpleRendererto the feature layer. - Set
ExtrusionModeof render,renderer.SceneProperties.ExtrusionMode = SceneProperties.ExtrusionMode.BaseHeight. - Set extrusion expression of renderer,
renderer.SceneProperties.ExtrusionExpression = "[POP2007]/ 10".
Relevant API
- ExtrusionExpression
- ExtrusionMode
- FeatureLayer
- SceneProperties
- ServiceFeatureTable
- SimpleRenderer
Tags
3D, extrude, extrusion, extrusion expression, height, renderer, scene
Sample Code
<?xml version="1.0" encoding="utf-8" ?>
<ContentPage x:Class="ArcGISRuntime.Samples.FeatureLayerExtrusion.FeatureLayerExtrusion"
xmlns="http://xamarin.com/schemas/2014/forms"
xmlns:x="http://schemas.microsoft.com/winfx/2009/xaml"
xmlns:esriUI="clr-namespace:Esri.ArcGISRuntime.Xamarin.Forms;assembly=Esri.ArcGISRuntime.Xamarin.Forms">
<Grid>
<Grid.RowDefinitions>
<RowDefinition Height="60" />
<RowDefinition Height="*" />
</Grid.RowDefinitions>
<Button x:Name="ToggleExtrusionDataButton"
Grid.Row="0"
Clicked="ToggleExtrusionData_Click"
Text="Show population density" />
<esriUI:SceneView x:Name="MySceneView" Grid.Row="1" />
</Grid>
</ContentPage>