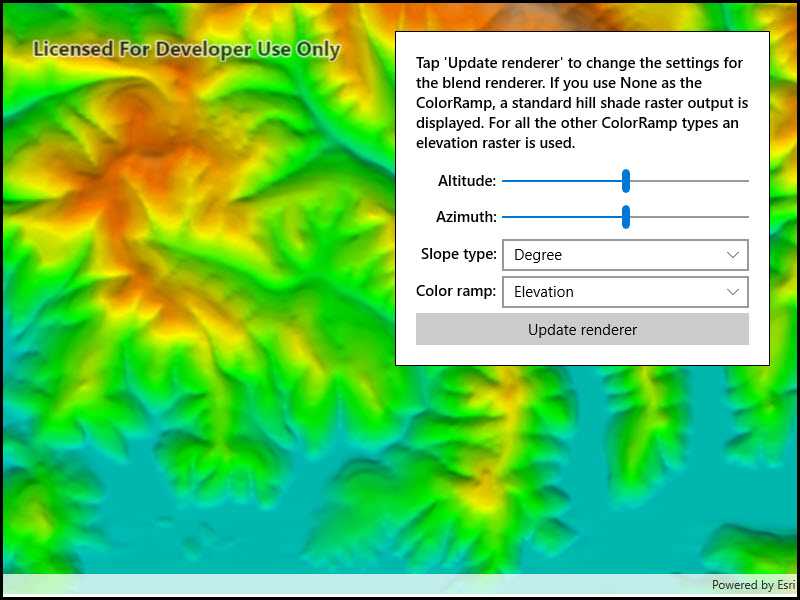
Blend a hillshade with a raster by specifying the elevation data. The resulting raster looks similar to the original raster, but with some terrain shading, giving it a textured look.

Use case
BlendRenderer can be used to apply a color ramp to a hillshade to emphasize areas of high or low elevation. A BlendRenderer can also be used to add a hillshade effect to aerial or satellite imagery, thereby making changes in elevation more visible.
How to use the sample
Choose and adjust the altitude, azimuth, slope type, and color ramp type settings to update the image.
How it works
- Create a
Rasterobject from a raster file. - Create a
RasterLayerobject from the raster. - Create a
Basemapobject from the raster layer and set it to the map. - Create another
Rasterobject for elevation from a grayscale raster file. - Create a
BlendRendererobject, specifying the elevation raster, color ramp, and other properties.- If you specify a non-null color ramp, use the elevation raster as the base raster in addition to the elevation raster parameter. That way, the color ramp is used instead of the satellite imagery.
- Set the blend renderer to the raster layer.
Relevant API
- BlendRenderer
- ColorRamp
- Raster
- RasterLayer
Offline data
This sample downloads the following items from ArcGIS Online automatically:
- shasta-elevation.zip - Shasta elevation image collection
Tags
Elevation, Hillshade, RasterLayer, color ramp, elevation, image, visualization
Sample Code
<UserControl x:Class="ArcGISRuntime.UWP.Samples.ChangeBlendRenderer.ChangeBlendRenderer"
xmlns="http://schemas.microsoft.com/winfx/2006/xaml/presentation"
xmlns:x="http://schemas.microsoft.com/winfx/2006/xaml"
xmlns:esriUI="using:Esri.ArcGISRuntime.UI.Controls">
<UserControl.Resources>
<Style TargetType="TextBlock">
<Setter Property="FontWeight" Value="SemiBold" />
<Setter Property="VerticalAlignment" Value="Center" />
<Setter Property="HorizontalAlignment" Value="Right" />
</Style>
<Style TargetType="TextBox">
<Setter Property="HorizontalAlignment" Value="Stretch" />
<Setter Property="Margin" Value="0,5,0,0" />
</Style>
<Style TargetType="Slider">
<Setter Property="Padding" Value="0,0,0,0" />
<Setter Property="Margin" Value="5,0,0,-8" />
<Setter Property="HorizontalAlignment" Value="Stretch" />
</Style>
<Style TargetType="ComboBox">
<Setter Property="HorizontalAlignment" Value="Stretch" />
<Setter Property="Margin" Value="5,5,0,0" />
</Style>
</UserControl.Resources>
<Grid>
<esriUI:MapView x:Name="MyMapView" />
<Border Style="{StaticResource BorderStyle}">
<Grid>
<Grid.RowDefinitions>
<RowDefinition Height="Auto" />
<RowDefinition Height="Auto" />
<RowDefinition Height="Auto" />
<RowDefinition Height="Auto" />
<RowDefinition Height="Auto" />
<RowDefinition Height="Auto" />
</Grid.RowDefinitions>
<Grid.ColumnDefinitions>
<ColumnDefinition Width="Auto" />
<ColumnDefinition Width="*" />
</Grid.ColumnDefinitions>
<TextBlock
Text="Tap 'Update renderer' to change the settings for the blend renderer. If you use None as the ColorRamp, a standard hill shade raster output is displayed. For all the other ColorRamp types an elevation raster is used."
Grid.Row="0" Grid.Column="0" Grid.ColumnSpan="2"
Margin="0,0,0,10"
TextWrapping="Wrap" HorizontalAlignment="Stretch" />
<TextBlock Text="Altitude: "
Grid.Row="1" Grid.Column="0" />
<Slider x:Name="AltitudeSlider"
Grid.Row="1" Grid.Column="1" />
<TextBlock Text="Azimuth:"
Grid.Row="2" Grid.Column="0" />
<Slider x:Name="AzimuthSlider"
Grid.Row="2" Grid.Column="1" />
<TextBlock Text="Slope type:"
Grid.Row="3" Grid.Column="0" />
<ComboBox x:Name="SlopeTypes"
Grid.Row="3" Grid.Column="1" />
<TextBlock Text="Color ramp:"
Grid.Row="4" Grid.Column="0" />
<ComboBox x:Name="ColorRamps"
Grid.Row="4" Grid.Column="1" />
<Button x:Name="UpdateRenderer"
Grid.Row="5" Grid.Column="0" Grid.ColumnSpan="2"
Content="Update renderer"
Margin="0,5,0,0"
IsEnabled="False"
HorizontalAlignment="Stretch"
Click="OnUpdateRendererClicked" />
</Grid>
</Border>
</Grid>
</UserControl>