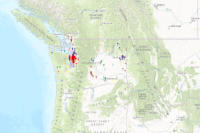
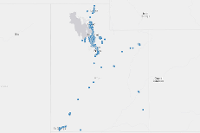
Publishing your data can be accomplished in two simple steps:
- Add the local data as an item to the portal
- Call the publish() method on the item
This sample notebook shows how different types of GIS datasets can be added to the GIS, and published as web layers.
Import Libraries
from IPython.display import display
from arcgis.gis import GIS
import os
Connect to GIS
gis = GIS('Home')Remove existing content
For this illustration, in order to have the code and data operations below run smoothly, we'll use the cells below to delete existing .zip, .sd, or services from the gis content and delete the existing folder that could cause conflict during publishing.
def delete_existing_items(item_types, name_list):
    for current_item_type in item_types:
        for file_name in name_list:
            search_result = gis.content.search(query=file_name, item_type=current_item_type)
            if len(search_result) > 0:
                for item in search_result:
                    item.delete(permanent=True) # if recycle bin is enabled, otherwise the parameter is ignored
                    print("Deleted existing " + current_item_type + ": ", item)

item_types = ["Service Definition", "Feature Layer Collection", "Map Service"]
name_list = ["Nursing_home_locations", "NewPy_WTL_test_SingleLayerBuildCache"]
delete_existing_items(item_types, name_list)

item_types = ["Shapefile", "Feature Layer Collection"]
name_list = ["power_pedestals_2012"]
delete_existing_items(item_types, name_list)

item_types = ["CSV", "Feature Layer Collection"]
name_list = ["Chennai_precipitation"]
delete_existing_items(item_types, name_list)
Deleted existing Service Definition: <Item title:"Nursing_home_locations" type:Service Definition owner:arcgis_python> Deleted existing Service Definition: <Item title:"NewPy_WTL_test_SingleLayerBuildCache" type:Service Definition owner:arcgis_python> Deleted existing Feature Layer Collection: <Item title:"Nursing_home_locations" type:Feature Layer Collection owner:arcgis_python> Deleted existing Map Service: <Item title:"NewPy_WTL_test_SingleLayerBuildCache" type:Map Image Layer owner:arcgis_python>
def delete_existing_folder(folder_name):
    try:
        folder = gis.content.folders.get(folder_name)
        return folder.delete(permanent=True) # if recycle bin is enabled, otherwise the parameter is ignored
    except:
        return False

my_folder_name = "Rainfall Data"
delete_existing_folder(my_folder_name) # returns True if folder exists, or False if non-exist
True
Publish all the service definition files in a folder
The sample below lists all the service definition (.sd) files in a data directory and publishes them as web layers. To publish a service definition file, we first add the .sd file to the Portal, and then call the publish() method:
# path relative to this notebook
data_dir = "data/publishing_sd_shapefiles_and_csv/"

#Get list of all files
file_list = os.listdir(data_dir)

#Filter and get only .sd files
sd_file_list = [x for x in file_list if x.endswith(".sd")]
print("Number of .sd files found: " + str(len(sd_file_list)))
Number of .sd files found: 2
root_folder = gis.content.folders.get()
# Loop through each file and publish it as a service
for current_sd_file in sd_file_list:
    item = root_folder.add(
        item_properties={
            "title": "New Layer",
            "type": "Service Definition"
        },
        file=data_dir + current_sd_file).result()   # .sd file is uploaded and a .sd file item is created
    if "BuildCache" not in current_sd_file:
        published_item = item.publish()   # .sd file item is published and a web layer item is created
    else:
        published_item = item.publish(build_initial_cache=True)  # publish as hosted tile layer with "build cache" enabled
display(published_item)In the example shown above, one .sd file produced a web feature layer and another produced a web tile layer
Note: When publishing an SD file to Enterprise with customized
publish_parameters, as specified in REST API, the customization of item properties, such as title, snippets, tags, and description, will not be reflected in the properties of online SD file, or the published service. Instead, the SD file item, and the service item will contain the local SD file's original settings. A recommended workflow is to useupdate()method after uploading the SD file, and publishing the service.
Now we'll connect to an ArcGIS Enterprise deployment and publish a service definition file and illustrate the updating of item properties published from them:
p_gis = GIS("your_enterprise_profile")sd_file = "data/publishing_sd_shapefiles_and_csv/Nursing_home_locations.sd"Let's add the service definition file item:
proot_folder = p_gis.content.folders.get()
uploaded_file = proot_folder.add({
    "title": "Nursing Home Location",
    "type": "Service Definition"}, file=sd_file).result()
uploaded_file.tags
['opendata', 'health', 'automation', 'ArcGIS', 'Service Definition', '.sd']
We'll update some of the item properties for the service definition file by defining a dictionary and inputting it the Item.update() method.
item_properties = {
    "title": "Nursing Home Locations from SD file",
    "tags" : uploaded_file.tags + ["test 1st", "test 2nd", "test 2023"],
    "snippet": "Nursing homes in Washington state added in API",
    "description": "Locations of nursing homes in US state of Washington",
    "type": "Feature Service",
    "typeKeywords": "Data, Feature Service, Hosted Service, Service, Singlelayer",
    'access': 'org'
}
uploaded_file.update(item_properties) # this procedure overwrites the properties you set in sd file
uploaded_file.tags['opendata', 'health', 'automation', 'ArcGIS', 'Service Definition', '.sd', 'test 1st', 'test 2nd', 'test 2023']
# Publish the service from the service definition item
item = uploaded_file.publish()
item.tags
['opendata', 'health', 'automation', 'ArcGIS', 'Service Definition', '.sd']
item.update(item_properties) # this procedure overwrites the properties you set in service
item.tags
['opendata', 'health', 'automation', 'ArcGIS', 'Service Definition', '.sd', 'test 1st', 'test 2nd', 'test 2023']
With update() called after SD file uploading, and SD item being published into web service, the item properties have adopted the user customization (and modified the original settings in the local SD file).
item.delete(permanent=True)
uploaded_file.delete(permanent=True)
Recycle bin not enabled on this organization. Permanent delete parameter ignored. Recycle bin not enabled on this organization. Permanent delete parameter ignored.
True
Publish a feature service from a shapefile and update the item information
To publish a shapefile, we first add the zipped shapefile to the Portal as an item, then call publish() method on the item to create a web layer. Often times, your shape files or service definitions may not contain the metadata you want to show on the portal item. This sample demonstrates how you can update those properties after publishing a web layer.
data = "data/power_pedestals_2012.zip"
shpfile = root_folder.add({"title": "power_pedestals_2012", "type": "Shapefile"}, data).result()shpfilepublished_service = shpfile.publish()display(published_service)The web layer item has minimal information and a default thumbnail.
Update the layer item's metadata
To update the metadata and set the thumbnail, use the update() method on the web layer's item obtained during publishing.
thumbnail_path = "data/power_pedestals_thumbnail.PNG"
item_properties = {"snippet":"""This dataset was collected from Utah DOT open data portal.
                            Source URL: <a href="http://udot.uplan.opendata.arcgis.com/
                            datasets/a627bb128ac44767832402f7f9bde909_10">http://udot.uplan.opendata.arcgis.com/
                            datasets/a627bb128ac44767832402f7f9bde909_10</a>""",
                   "title":"Locations of power pedestals collected in 2012",
                   "tags":"opendata"}
published_service.update(item_properties, thumbnail=thumbnail_path)
display(published_service)Publish a CSV file and move it into a folder
To publish a CSV file, we first add the .csv file to the Portal, and then call the publish() method to publish it as a layer. Once published, we create a destination folder on the server and then move the published items into that folder
csv_file = 'data/Chennai_precipitation.csv'
csv_item = root_folder.add({"title": "Chennai Precipitation", "type": "CSV"}, csv_file).result()display(csv_item)The csv file used in this sample has a column titled LOCATION containing place names in text. During the publishing process we specify this column as an address_fields parameter. The server geocodes these locations to create point features for the web layer.
csv_lyr = csv_item.publish(None, {"Address":"LOCATION"})display(csv_lyr)Create a new folder for the items
The create() from GIS.content.folders can be used to create a new folder. Once created, the move() of the Item can be used to move the items into the folder.
# create a new folder called 'Rainfall Data'
new_folder = gis.content.folders.create(my_folder_name)
print(new_folder)
{'username': 'arcgis_python', 'id': '3b6a6606e9c3460eac644c5d3d8972b2', 'title': 'Rainfall Data'}
# move both the csv_item and csv_lyr items into this new folder
csv_item.move(new_folder)  # Here you could either pass name of the folder or the dictionary
                                   # returned from create_folder() or folders property on a User object

csv_lyr.move(new_folder)
{'success': True,
'itemId': '73276a77fe854be980a39e5fd683705f',
'owner': 'arcgis_python',
'folder': '3b6a6606e9c3460eac644c5d3d8972b2'}Now that the items are moved, we can request for the item's ownerFolder property and ensure it matches the id of the folder created in the previous step
print(csv_lyr.ownerFolder)3b6a6606e9c3460eac644c5d3d8972b2


