Learn how to use an ArcGIS portal item to access and display a feature layer in a map.
You can host a variety of geographic data and other resources using ArcGIS Online. These portal items can also define how the data is presented. A web map or web scene, for example, not only defines the layers for a map or scene, but also how layers are symbolized, the minimum and/or maximum scales at which they display, and several other properties. Likewise, a hosted feature layer contains the data for the layer and also defines the symbols and other display properties for how it is presented. When you add a map, scene, or layer from a portal item to your app, everything that has been saved with the item is applied in your app. Adding portal items to your app rather than creating them programmatically saves you from writing a lot of code, and can provide consistency across apps that use the same data.
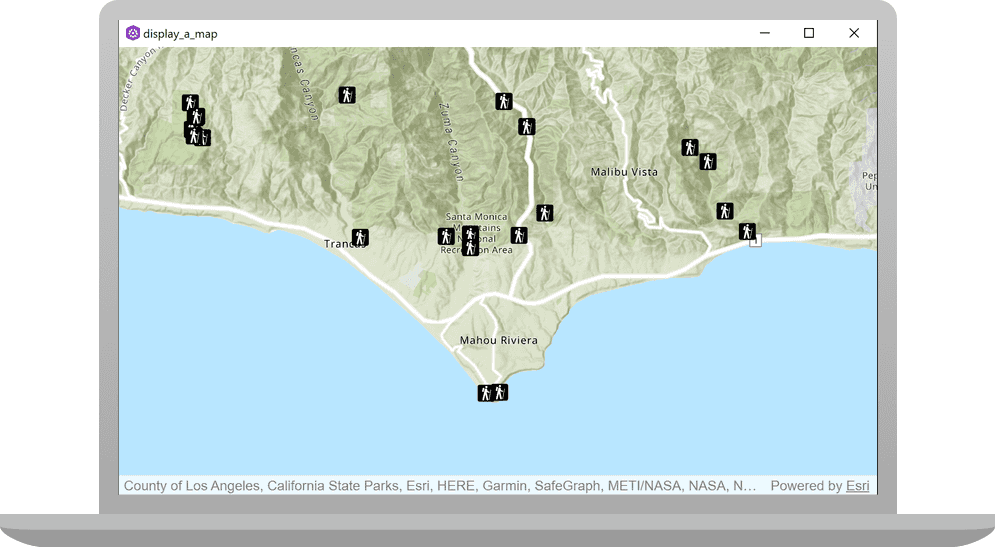
In this tutorial, you will add a hosted feature layer to display trailheads in the Santa Monica Mountains of Southern California. The hosted layer defines the trailhead locations (points) as well as the symbols used to display them.
Prerequisites
Before starting this tutorial:
-
You need an ArcGIS Location Platform or ArcGIS Online account.
-
Your system meets the system requirements.
-
The ArcGIS Maps SDK for Qt, version 200.6.0 or later is installed.
-
The Qt 6.5.6 software development framework is installed.
Develop or Download
You have two options for completing this tutorial:
Option 1: Develop the code
To start the tutorial, complete the Display a map tutorial. This creates a map to display the Santa Monica Mountains in California using the topographic basemap from the ArcGIS basemap styles service.
Open a Qt Creator project
- Open the project you created by completing the Display a map tutorial.
- Continue with the following instructions to use an ArcGIS portal item to access and display a feature layer in a map.
Include header files
Your app needs the Portal and PortalItem classes to load an item hosted on ArcGIS Online and display it as a FeatureLayer in the map.
-
In the project, open the Sources folder and open the Display_a_map.cpp file. Add the following four include statements.
Display-a-map.cppUse dark colors for code blocks #include "Display_a_map.h" #include "Map.h" #include "MapTypes.h" #include "MapQuickView.h" #include "Point.h" #include "Viewpoint.h" #include "SpatialReference.h" #include <QFuture> #include "Portal.h" #include "PortalItem.h" #include "FeatureLayer.h" #include "LayerListModel.h"
Add the trailheads feature layer to the map
You will connect to ArcGIS Online and access a hosted item (trailheads layer) using its item ID. You can then create a FeatureLayer to display the PortalItem in the map.
-
Create a
Portalinstance using the default constructor.Display-a-map.cppUse dark colors for code blocks const Point center(-118.80543, 34.02700, SpatialReference::wgs84()); const Viewpoint viewpoint(center, 100000.0); m_mapView->setViewpointAsync(viewpoint); Portal* portal = new Portal(this); -
Create a
PortalItemthat references the trailheads item ID on thePortal.Display-a-map.cppUse dark colors for code blocks Portal* portal = new Portal(this); const QString itemId("2e4b3df6ba4b44969a3bc9827de746b3"); PortalItem* portalItem = new PortalItem(portal, itemId, this); -
Create a
FeatureLayer, using thePortalItemand referencing aserviceofLayer Id 0(zero). Then append this layer to the map's data layers (operational layers). Save the file.Display-a-map.cppUse dark colors for code blocks const QString itemId("2e4b3df6ba4b44969a3bc9827de746b3"); PortalItem* portalItem = new PortalItem(portal, itemId, this); FeatureLayer* trailheadsLayer = new FeatureLayer(portalItem, 0, this); m_map->operationalLayers()->append(trailheadsLayer);Press Ctrl + R to run the app.
Your app should display a map with the trailheads centered on the Santa Monica Mountains. Double-click, drag, and scroll the mouse wheel over the map view to explore the map.
Alternatively, you can download the tutorial solution, as follows.
Option 2: Download the solution
-
Click the
Download solutionlink underSolutionand unzip the file to a location on your machine. -
Open the project in Qt Creator.
Since the downloaded solution does not contain authentication credentials, you must set up authentication to create the developer credentials and add them to the project.
Set up authentication
To access the secure ArcGIS location services used in this tutorial, you must implement API key authentication using an ArcGIS Location Platform or an ArcGIS Online account.
Create a new API key access token with privileges to access the secure resources used in this tutorial.
-
Complete the Create an API key tutorial and create an API key with the following privilege(s):
- Privileges
- Location services > Basemaps
- Privileges
-
Copy and paste the API key access token into a safe location. It will be used in a later step.
Set developer credentials in the solution
To allow your app users to access ArcGIS location services, use the developer credentials that you created in the Set up authentication step to authenticate requests for resources.
-
In the Projects window, go to the Sources folder
-
Open the main.cpp file.
-
Modify the code to set the
accessusing your API key access token.Token main.cppUse dark colors for code blocks // 2. API key authentication: Get a long-lived access token that gives your application access to // ArcGIS location services. Go to the tutorial at https://links.esri.com/create-an-api-key. // Copy the API Key access token. const QString accessToken = QString(""); -
Save and close the file.
Best Practice: The access token is stored directly in the code as a convenience for this tutorial. Do not store credentials directly in source code in a production environment.
Run the solution
Press Ctrl + R to run the app.
Your app should display a map with the trailheads centered on the Santa Monica Mountains. Double-click, drag, and scroll the mouse wheel over the map view to explore the map.
What's next?
Learn how to use additional API features, ArcGIS location services, and ArcGIS tools in these tutorials.