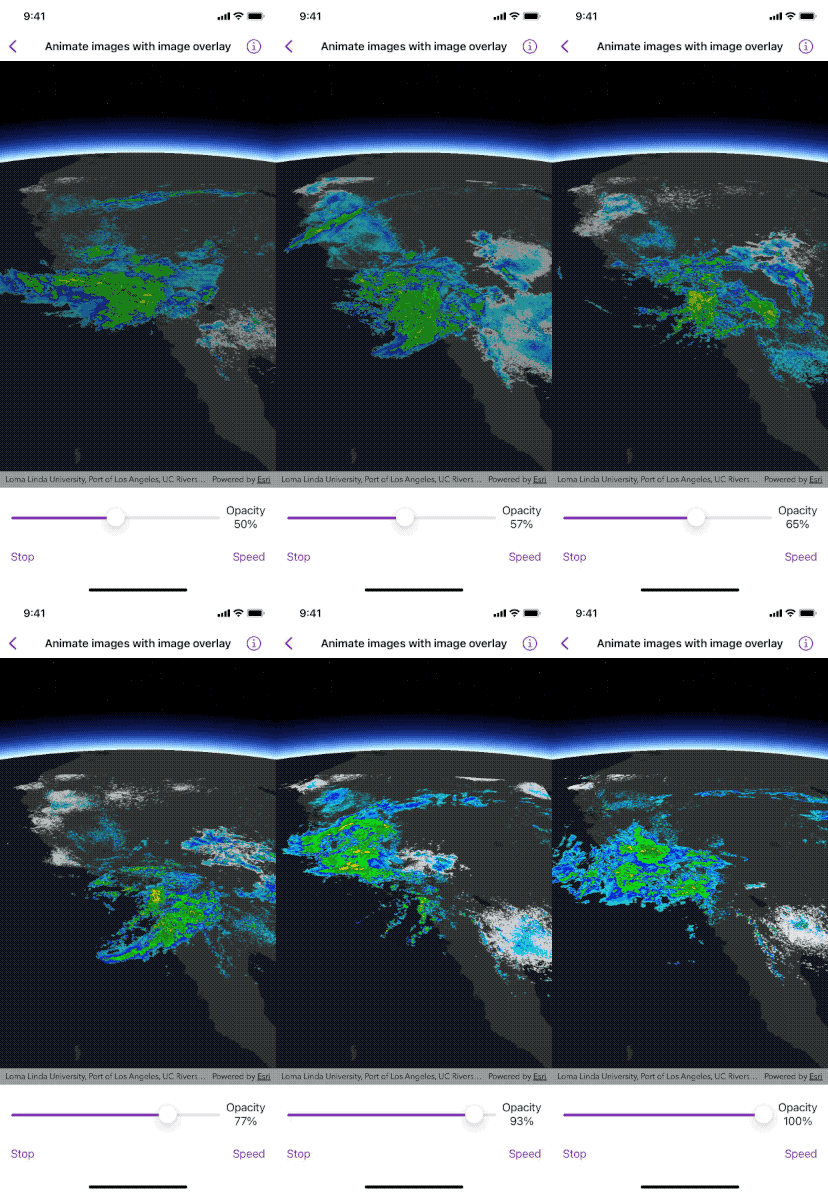
Animate a series of images with an image overlay.

Use case
An image overlay is useful for displaying fast and dynamic images; for example, rendering real-time sensor data captured from a drone. Each frame from the drone becomes a static image which is updated on the fly as the data is made available.
How to use the sample
The sample loads a map of the Southwestern United States. Tap the "Start" or "Stop" buttons to start or pause the radar animation. Tap the "Speed" button to select a playback speed to decide how quickly the animation plays. Move the slider to change the opacity of the image overlay.
How it works
- Create an
ImageOverlayand add it to theSceneView. - Set up a timer with an initial preferred frames per second of 60.
- Connect to the timeout signal from the timer.
- Create a new image frame every timeout and set it on the image overlay.
Relevant API
- ImageFrame
- ImageOverlay
- SceneView
About the data
These radar images were captured by the US National Weather Service (NWS). They highlight the Pacific Southwest sector which is made up of part the western United States and Mexico. For more information visit the NOAA Jetstream website. The archive for radar images can be downloaded from ArcGIS Online.
Additional information
The supported image formats are GeoTIFF, TIFF, JPEG, and PNG. ImageOverlay does not support the rich processing and rendering capabilities of a RasterLayer. Use Raster and RasterLayer for static image rendering, analysis, and persistence.
Tags
3d, animation, drone, dynamic, image frame, image overlay, real time, rendering
Sample Code
// Copyright 2023 Esri
//
// Licensed under the Apache License, Version 2.0 (the "License");
// you may not use this file except in compliance with the License.
// You may obtain a copy of the License at
//
// https://www.apache.org/licenses/LICENSE-2.0
//
// Unless required by applicable law or agreed to in writing, software
// distributed under the License is distributed on an "AS IS" BASIS,
// WITHOUT WARRANTIES OR CONDITIONS OF ANY KIND, either express or implied.
// See the License for the specific language governing permissions and
// limitations under the License.
import ArcGIS
import SwiftUI
struct AnimateImagesWithImageOverlayView: View {
/// The view model for the sample.
@StateObject private var model = Model()
/// The text for the start stop button.
@State private var startStopButtonText = "Start"
var body: some View {
VStack {
// Create a scene view to display the scene.
SceneView(scene: model.scene, imageOverlays: [model.imageOverlay])
VStack {
HStack {
Slider(value: $model.imageOverlay.opacity, in: 0.0...1.0, step: 0.01)
VStack {
Text("Opacity")
Text(model.imageOverlay.opacity, format: .percent.precision(.fractionLength(0)))
}
}
.padding([.top, .horizontal])
HStack {
Button(startStopButtonText) {
startStopButtonText = model.displayLink.isPaused ? "Stop" : "Start"
model.displayLink.isPaused.toggle()
}
Spacer()
Menu("Speed") {
Picker("Speed Selection", selection: $model.displayLink.preferredFramesPerSecond) {
Text("Slow").tag(15)
Text("Medium").tag(30)
Text("Fast").tag(60)
}
}
}
.padding()
}
}
}
}
private extension AnimateImagesWithImageOverlayView {
/// The view model for the sample.
class Model: ObservableObject {
/// A scene with a dark gray base and centered on Southern California.
let scene: ArcGIS.Scene = {
// Creates a scene and set an initial viewpoint.
let scene = Scene(basemapStyle: .arcGISDarkGrayBase)
let point = Point(x: -116.621, y: 24.7773, z: 856977, spatialReference: .wgs84)
let camera = Camera(location: point, heading: 353.994, pitch: 48.5495, roll: 0)
scene.initialViewpoint = Viewpoint(latitude: .nan, longitude: .nan, scale: .nan, camera: camera)
// Add base surface from elevation service.
let elevationSource = ArcGISTiledElevationSource(url: .worldElevationService)
let surface = Surface()
surface.addElevationSource(elevationSource)
scene.baseSurface = surface
return scene
}()
/// A timer to synchronize image overlay animation to the refresh rate of the display.
@Published var displayLink = CADisplayLink()
/// An iterator to hold and loop through the overlay images.
private var imagesIterator: CircularIterator<UIImage> = {
// Get the URLs to images added to the project's folder reference.
let imageURLs = Bundle.main.urls(forResourcesWithExtension: "png", subdirectory: "PacificSouthWest2") ?? []
let images = imageURLs
.sorted { $0.lastPathComponent < $1.lastPathComponent }
.map { UIImage(contentsOfFile: $0.path)! }
return CircularIterator(elements: images)
}()
/// An envelope of the pacific southwest sector for displaying the image frame.
private let pacificSouthwest = Envelope(
center: Point(latitude: 35.131016955536694, longitude: -120.0724273439448),
width: 15.09589635986124,
height: -14.3770441522488
)
/// The image overlay to show image frames.
@Published var imageOverlay: ImageOverlay = {
let imageOverlay = ImageOverlay()
imageOverlay.opacity = 0.5
return imageOverlay
}()
init() {
// Create display link and load first image.
displayLink = makeDisplayLink()
setImageFrame()
}
deinit {
// Invalidate display link before exiting.
displayLink.invalidate()
}
/// Creates a display link timer for the image overlay animation.
/// - Returns: A new `CADisplayLink` object.
func makeDisplayLink() -> CADisplayLink {
// Create new display link.
let newDisplayLink = CADisplayLink(target: self, selector: #selector(setImageFrame))
// Set the default frame rate to 60 fps.
newDisplayLink.preferredFramesPerSecond = 60
newDisplayLink.isPaused = true
// Add to main thread common mode run loop, so it is not effected by UI events.
newDisplayLink.add(to: .main, forMode: .common)
return newDisplayLink
}
/// Sets the image frame to the next one.
@objc
func setImageFrame() {
if let image = imagesIterator.next() {
let frame = ImageFrame(image: image, extent: pacificSouthwest)
imageOverlay.imageFrame = frame
}
}
}
/// A generic circular iterator.
private struct CircularIterator<Element>: IteratorProtocol {
/// An array of elements to be iterated over.
private let elements: [Element]
/// The element iterator.
private var elementIterator: Array<Element>.Iterator
init(elements: [Element]) {
self.elements = elements
elementIterator = elements.makeIterator()
}
/// Moves to the next element if there is one or starts over by creating
/// a new iterator.
/// - Returns: The next element.
mutating func next() -> Element? {
if let next = elementIterator.next() {
return next
} else {
elementIterator = elements.makeIterator()
return elementIterator.next()
}
}
}
}
private extension URL {
/// A world elevation service from Terrain3D ArcGIS REST service.
static var worldElevationService: URL {
URL(string: "https://elevation3d.arcgis.com/arcgis/rest/services/WorldElevation3D/Terrain3D/ImageServer")!
}
}