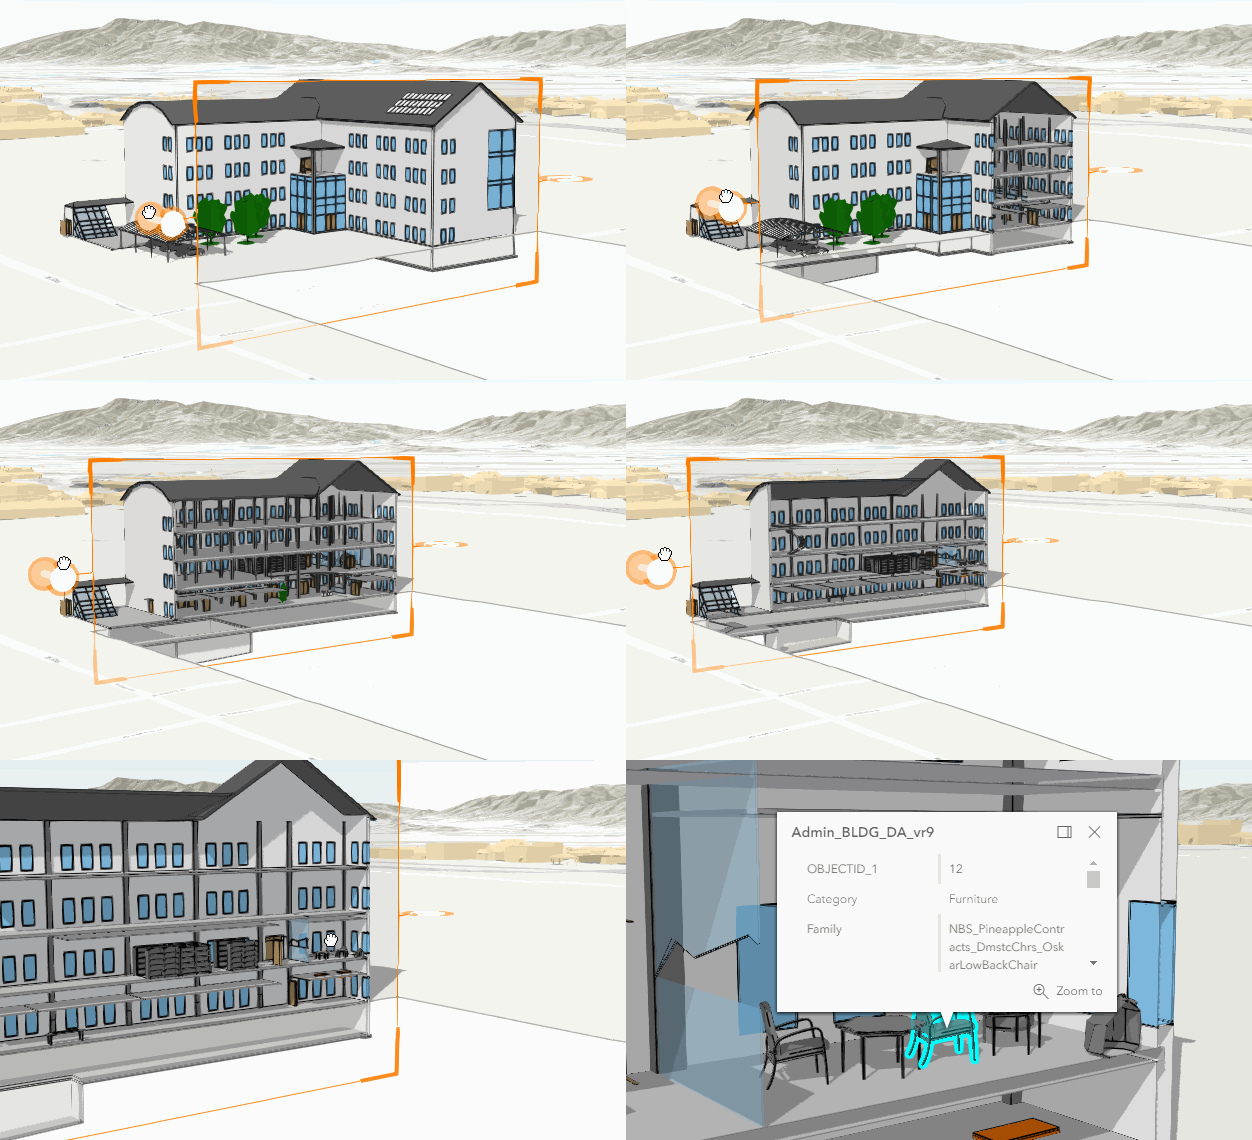
In this sample we load a building with detailed interior information from a BIM project. The building was published as a BuildingSceneLayer from a Revit project using ArcGIS Pro.
Creating and adding a BuildingSceneLayer to a WebScene works the same as for the other layers:
const buildingLayer = new BuildingSceneLayer({
url: "https://tiles.arcgis.com/tiles/V6ZHFr6zdgNZuVG0/arcgis/rest/services/Esri_Admin_Building/SceneServer",
title: "Administration Building, Redlands - Building Scene Layer"
});
webscene.layers.add(buildingLayer);A BuildingSceneLayer contains complex digital models of buildings and interiors. Because of the high complexity, the data in a BuildingSceneLayer is organized in sublayers. Often, the BuildingSceneLayer contains an overview layer that displays only the exterior shell of a building (exterior walls, rooftop and so on). This helps viewing the model as a single feature. The BuildingSceneLayer also contains a full model BuildingGroupSublayer that contains all the features in a building grouped by disciplines: Architectural, Structural, Electrical and Mechanical. Each of the disciplines contains BuildingComponentSublayers with features such as rooftop, walls, doors, AC units, lighting fixtures, columns, foundation and so on.
Usually when adding a BuildingSceneLayer to a WebScene or a Map, only the overview layer is visible. In our sample, we want to view the full model from the beginning. So we hide the overview layer and display the full model layer:
buildingLayer.sublayers.forEach((layer) => {
switch (layer.modelName) {
case "FullModel":
layer.visible = true;
break;
case "Overview":
layer.visible = false;
break;
}
});"FullModel" and "Overview" are direct sublayers of a BuildingSceneLayer. In case you want to search within subgroups of a BuildingSceneLayer you can use BuildingSceneLayer.allSublayers which is the flat array of sublayers. To identify the sublayer it's better to use BuildingSceneLayer.modelName because this is a standard name based on the I3S specification and it cannot be changed.
The BuildingComponentSublayers are similar to a SceneLayer. You can apply renderers or enable popups.
In this sample we apply a renderer, to color all interior doors in red:
// A renderer can be set on a BuildingComponentSublayer
doorsLayer.renderer = {
type: "unique-value", // autocasts as new UniqueValueRenderer()
field: "AssemblyDesc",
uniqueValueInfos: [
{
// All interior doors are displayed red
value: "Interior Doors",
symbol: {
type: "mesh-3d", // autocasts as new MeshSymbol3D()
symbolLayers: [
{
type: "fill", // autocasts as new FillSymbol3DLayer()
material: {
color: "red"
}
}
]
}
}
]
};With so much detailed information in a building, it's inevitable that some parts of the building will occlude others. The Slice widget can be used to discover the interior parts of the building in an easy way.

The widget can be added to the SceneView like this:
const sliceWidget = new Slice({
view: view,
container: document.createElement("div")
});The layers that we want to examine in detail can be excluded from the slice, by adding them programmatically to the SliceViewModel.excludedLayers property.
sliceWidget.viewModel.excludedLayers.addMany(excludedLayers);The user can also select the excluded layers using the widget UI: click on "Exclude layer from slice" and then click on the layer that should be excluded directly in the scene.
In this sample we also set a SlicePlane when the widget is instantiated. Using SliceViewModel.shape the plane used for slicing can be retrieved or set.
See also Filter BuildingSceneLayer.