Create a custom widget using the Report dijit
This tutorial presents the basic steps to extend the Report class to create your own custom widget.
Note:
To develop a custom widget for Web AppBuilder, sufficient knowledge and experience using JavaScript and HTML are recommended, as well as a level of familiarity with the ArcGIS API for JavaScript and the Esri samples.
Enable a custom widget
To create a new custom widget with the Report class, use the Demo widget, which can be found in the client\stemapp\widgets\samplewidgets subfolder of the Web AppBuilder installation directory. To do this, complete the following steps:
- Copy the Demo folder found in the client\stemapp\widgets\samplewidgets subfolder of the Web AppBuilder directory.
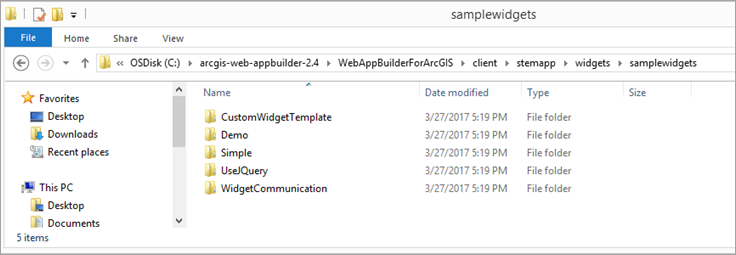
- Paste the folder in client\stemapp\widgets and rename it Report, or something similar.
- Browse to the Report widget folder, open the manifest.json file, and change the following:
- Change the name property to Report.
- Change any other properties (for example, author or description).
- Remove the featureActions array as it will not be used in this example.
- Add the properties attribute and include "hasConfig":false.
- Save the manifest.json file.
{ "name": "Report", "platform": "HTML", "version": "2.4", "wabVersion": "2.4", "author": "Artemis F.", "description": "This is the Report Widget", "copyright": "", "license": "http://www.apache.org/licenses/LICENSE-2.0", "properties": { "hasConfig": false } } - Next, browse to the nls subfolder and open the strings.js file.
- Change the _widgetLabel to Report.
Making this change enables the widget to have this name when it's selected in the Builder environment. Remove the rest of the attributes in the root object and save the file.
The code should look like this:
define({
  root: ({
    _widgetLabel: "Report"
  }),
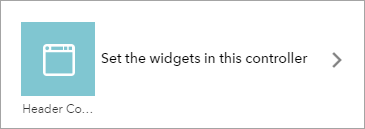
Once the changes are applied, the widget is deployed in the Builder environment and you should be able to choose it from the list of widgets. To test, you can create a new app in Web AppBuilder. The widget is an in-panel widget on the Widget tab. Select it within the Header Controller as shown below:
When you add a new widget, you'll see a list of widgets to choose from. This list includes the Report Feature widget:
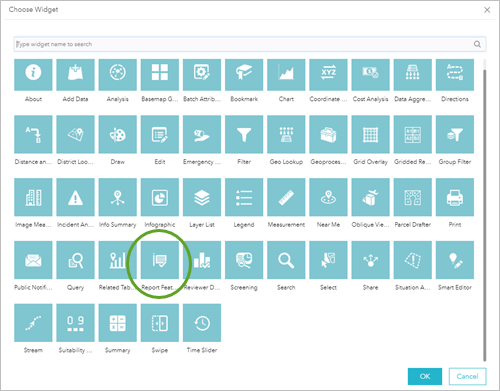
The widget will be deployed to your app once you select it and click OK. Save the app.
Add code for the custom widget
The next step for the custom widget is to change the underlying code to incorporate the functionality for the Report class.
Open the Web AppBuilder installation folder. The widget is already deployed in the app, and you can continue working on the app’s folder directly without having to redeploy the widget every time you want to test the changes. To find the widget in the app folder, browse to server\apps\ID\widgets and open the Report subfolder.
- Open the widget.js file in this subfolder. Change the baseClass property to match the folder’s name, so it will be baseClass: ‘jimu-widget-report’.
- Include the Report and PageUtils modules in the require statement. The defined statement should look like the following:
define(['dojo/_base/declare', 'jimu/BaseWidget', 'jimu/dijit/Report', 'jimu/dijit/PageUtils'], function(declare, BaseWidget, Report, PageUtils) - Now examine the code. There is a set of standard widget event handlers defined here that you can start plugging code into to see how things work. You will use the startup function to initialize the report. Delete the existing code and add the following code:
startup: function() { this.inherited(arguments); this.report = new Report({ footNotes: "Report Generated by Artemis", printTaskUrl: "http://utility.arcgisonline.com/arcgis/rest/services/Utilities/PrintingTools/GPServer/Export%20Web%20Map%20Task", reportLayout: { "pageSize": PageUtils.PageSizes.A4, "orientation": PageUtils.Orientation.Landscape } }); console.log('startup'); } - At this point, you have used the Report class to create a new report, but you are missing the UI for the widget. The widget needs to have a button that the end user will click to generate the report. Go to the widget.html file to see how to add it. Delete all the content in this file and add the following code:
<div> <div class="jimu-btn" data-dojo-attach-point="btnPrint" data-dojo-attach-event="onclick:_onBtnPrintClicked">Generate Report</div> </div> - The above code creates a button with name btnPrint. When this button is clicked, the _onBtnPrintClicked function is called. Go back to the widget.js file and define this function. The code to define the function is as follows:
_onBtnPrintClicked: function(){
		var printData = [
		{
		  addPageBreak: true,
		  type: "map",
		  map: this.map
		},
		{
		  title: "List of parks",
		  addPageBreak: false,
		  type: "table",
		  tableCols: 3,
		  data: {
			showRowIndex: false,
			rows:  [["Brookside Park", "1630 Brookside Avenue, Redlands, CA 92373", "34.045347, -117.209909"],
			        ["Crafton Park", "Wabash Ave & Independence Ave, Redlands, CA 92374", "34.060946, -117.140118"],
					["Ford Park", "Parkford Dr & Redlands Blvd, Redlands, CA 92374", "34.043828, -117.160692"],
					["Prospect Park", "352 Prospect Dr., Redlands, CA 92373", "34.039145, -117.172582"],
					["Sylvan Park", "601 N University St, Redlands, CA 92374", "34.059977, -117.168179"]],
			cols: ["Name", "Address", "Lat/Lon"]
		  }
		},
		{
			title: "Photos",
			type: "html",
			data: '<div style="height: 450px;"><div style="width: 250px; margin-left: 10px; float: left;"><div><img style="width: 250px; height: 200px; float: left;" src="http://cityofredlands.org/sites/default/files/rda/Landmarks/brookside.jpg" /></div><div style="text-align:center; margin-bottom: 10px;">Brookside Park</div></div>'+
			      '<div style="width: 250px; margin-left: 10px; float: left;"><div><img style="width: 250px; height: 200px; float: left;" src="http://cityofredlands.org/sites/default/files/rda/Landmarks/Crafton.jpg" /></div><div style="text-align:center; margin-bottom: 10px;">Crafton Park</div></div>'+
				  '<div style="width: 250px; margin-left: 10px; float: left;"><div><img style="width: 250px; height: 200px; float: left;" src="http://cityofredlands.org/sites/default/files/rda/Landmarks/ford-park.jpg" /></div><div style="text-align:center; margin-bottom: 10px;">Ford Park</div></div>'+
				  '<div style="width: 250px; margin-left: 10px; float: left; clear:left;"><div><img style="width: 250px; height: 200px; float: left;" src="http://cityofredlands.org/sites/default/files/rda/Landmarks/Prospect%20park.jpg" /></div><div style="text-align:center; margin-bottom: 10px;">Prospect Park</div></div>'+
				  '<div style="width: 250px; margin-left: 10px; float: left;"><div><img style="width: 250px; height: 200px; float: left;" src="http://cityofredlands.org/sites/default/files/rda/Landmarks/Sylvan%20Park.jpg" /></div><div style="text-align:center; margin-bottom: 10px;">Sylvan Park</div></div></div>'
		}];
        this.report.print("Redlands Parks", printData);
      },
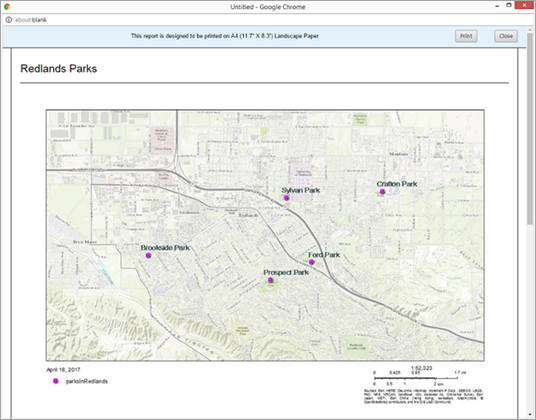
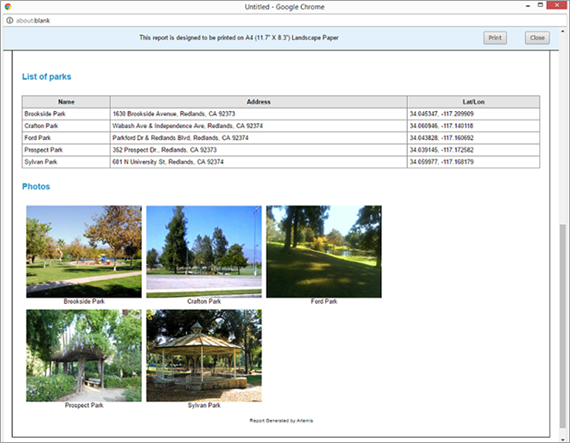
This code will create the data that you want to view in the report. It consists of three parts: map, table, and HTML. The map will inherit the same map that is used by the app. The table is a list of information that you want to show. In this example, you are showing a list of the parks in Redlands, California. The last part will display some photos of these parks using HTML.
- Currently, the Generate Report button text is hard-coded in the widget.html file. If you want to internationalize the UI, you need to isolate this string in a separate language-specific resource file. By default, the strings.js file in the nls folder is the file for the English language. Depending on the language of the localized string, you need to use the appropriate subfolder in the nls folder.
define({ root: ({ _widgetLabel: "Report", generateReport: "Generate Report" }),- Once the string.js file is updated, change the widget.html file to reference this string as shown below:
<div> <div class="jimu-btn" data-dojo-attach-point="btnPrint" data-dojo-attach-event="onclick:_onBtnPrintClicked">${nls.generateReport}</div> </div> - Run the app to use the new custom Report widget.
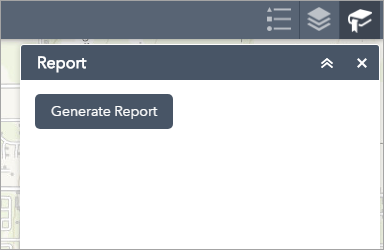
Once you click the button, you will see the report page. The figure below shows how the map appears in the report.
- Scroll down to see the table along with the HTML.
- Once the string.js file is updated, change the widget.html file to reference this string as shown below: