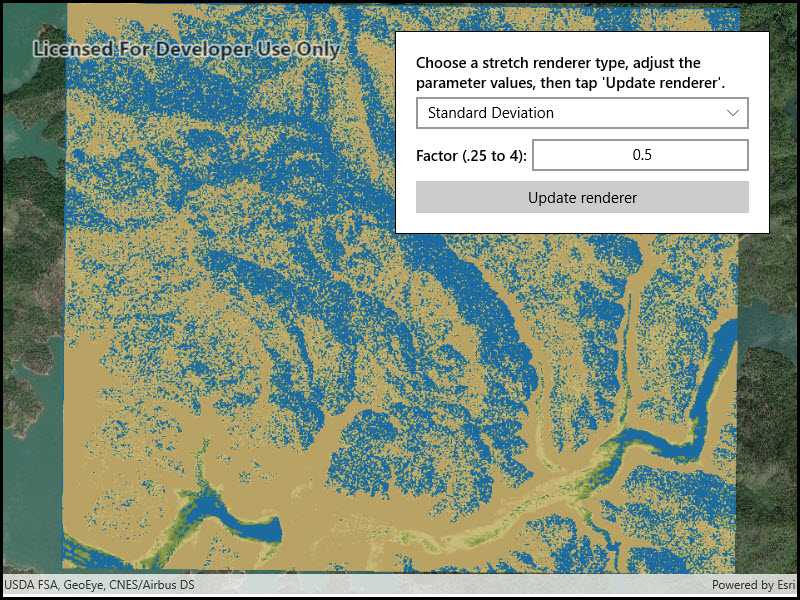
Use a stretch renderer to enhance the visual contrast of raster data for analysis.

Use case
An appropriate stretch renderer can enhance the contrast of raster imagery, allowing the user to control how their data is displayed for efficient imagery analysis.
How to use the sample
Choose one of the stretch parameter types:
- Standard deviation - a linear stretch defined by the standard deviation of the pixel values
- Min-max - a linear stretch based on minimum and maximum pixel values
- Percent clip - a linear stretch between the defined percent clip minimum and percent clip maximum pixel values
Then configure the parameters and click 'Update renderer'.
How it works
- Create a
Rasterfrom a raster file. - Create a
RasterLayerfrom theRaster. - Add the layer to the map.
- Create a
StretchRenderer, specifying the stretch parameters and other properties. - Apply the
Rendererto the raster layer.
Relevant API
- ColorRamp
- MinMaxStretchParameters
- PercentClipStretchParameters
- Raster
- RasterLayer
- StandardDeviationStretchParameters
- StretchParameters
- StretchRenderer
Offline data
This sample downloads the following items from ArcGIS Online automatically:
- raster-file.zip - Tif raster file
About the data
This sample uses a raster imagery tile of an area of forested mountainous terrain and rivers.
Additional information
See Stretch function in the ArcMap documentation for more information about the types of stretches that can be performed.
Tags
analysis, deviation, histogram, imagery, interpretation, min-max, percent clip, pixel, raster, stretch, symbology, visualization
Sample Code
<UserControl
x:Class="ArcGIS.UWP.Samples.ChangeStretchRenderer.ChangeStretchRenderer"
xmlns="http://schemas.microsoft.com/winfx/2006/xaml/presentation"
xmlns:x="http://schemas.microsoft.com/winfx/2006/xaml"
xmlns:esriUI="using:Esri.ArcGISRuntime.UI.Controls">
<UserControl.Resources>
<Style TargetType="TextBox">
<Setter Property="HorizontalAlignment" Value="Stretch" />
<Setter Property="Margin" Value="0,5,0,5" />
<Setter Property="TextWrapping" Value="Wrap" />
<Setter Property="TextAlignment" Value="Center" />
</Style>
<Style TargetType="TextBlock">
<Setter Property="Margin" Value="0,5,5,5" />
<Setter Property="VerticalAlignment" Value="Center" />
<Setter Property="FontWeight" Value="SemiBold" />
</Style>
</UserControl.Resources>
<Grid>
<esriUI:MapView x:Name="MyMapView" />
<Border Style="{StaticResource BorderStyle}">
<Grid>
<Grid.RowDefinitions>
<RowDefinition Height="Auto" />
<RowDefinition Height="Auto" />
<RowDefinition Height="Auto" />
<RowDefinition Height="Auto" />
<RowDefinition Height="Auto" />
</Grid.RowDefinitions>
<Grid.ColumnDefinitions>
<ColumnDefinition Width="Auto" />
<ColumnDefinition Width="*" />
</Grid.ColumnDefinitions>
<TextBlock
Text="Choose a stretch renderer type, adjust the parameter values, then tap 'Update renderer'."
Grid.Row="0" Grid.Column="0" Grid.ColumnSpan="2"
Margin="0"
TextWrapping="Wrap" />
<ComboBox x:Name="RendererTypes"
Grid.Row="1" Grid.Column="0" Grid.ColumnSpan="2"
Margin="0,5,0,5"
HorizontalAlignment="Stretch"
SelectionChanged="RendererTypes_SelectionChanged" />
<TextBlock x:Name="FirstParameterLabel"
Grid.Row="2" Grid.Column="0" />
<TextBox x:Name="FirstParameterInput"
Grid.Row="2" Grid.Column="1" />
<TextBlock x:Name="SecondParameterLabel"
Grid.Row="3" Grid.Column="0" />
<TextBox x:Name="SecondParameterInput"
Grid.Row="3" Grid.Column="1" />
<Button Content="Update renderer"
Grid.Row="4" Grid.Column="0" Grid.ColumnSpan="2"
Margin="0,5,0,0"
HorizontalAlignment="Stretch"
Click="OnUpdateRendererClicked" />
</Grid>
</Border>
</Grid>
</UserControl>