 Hide Table of Contents
 Tutorials
 About the API
 Work with the API
 Graphics and feature layers
 Popups and Info Windows
 Mobile
 ArcGIS Server Services
 References
 What's New archive

Features in map layers can be styled using CSS when features are drawn using SVG (scalable vector graphics). SVG is a text-based image format and is defined using markup code similar to HTML. This is an attractive alternative to using renderers or symbols for developers accustomed to using CSS. Another reason to style features using CSS is to animate features, which is not easily done with symbols and renderers. Other vector drawing methods used in legacy browsers, VML and canvas, do not support styling via CSS.
There are two new constructor options and one new property for the GraphicsLayer
that can be used to style features:
styling, dataAttributes, and surfaceType.
styling is a boolean value. It indicates whether the layer is responsible for
styling graphics (in which case a graphic's symbol or the layer's renderer is used) or if CSS will be
used for styling the graphics. The default value is true. If you set it to false the shapes will be
added to the DOM, but they will not be styled. Styles must be applied using CSS.
dataAttributes is a string or an array of strings corresponding to attribute fields to be
added as custom data attributes on each graphic's node. Developers can select a particular type of
feature(s) using CSS and apply custom styling to the shapes of the selected features. The data attribute
name must be at least one character long and must be prefixed with "data-". It should not contain any
uppercase letters.
surfaceType describes the vector drawing method for a layer. It can be one of these: "svg",
"canvas-2d" or "vml" and is always the same for all vector layers on a map.
The default value is "SVG" for all browsers except Internet Explorer versions 7, 8 and earlier, where VML is used.
Individual SVG elements can be styled because it uses a DOM. In contrast, canvas provides a surface but does not implement a DOM so it is not possible to address individual or groups of features according to an attribute.
Preparing the layer to be styled by CSS
In order to style the features using CSS we set the styling property to false and the
dataAttributes property to the name of the attribute we are targeting.
We then set the attribute of the graphics as "data-classbreak" and the value as a string
depending on the value of the field in the attribute table. For the code snippet below, we set the dataAttribute
to "fb_pop" which corresponds to one of the attributes in our feature service.
function addFeatureLayer() {
  // create feature layer with styling set to false and dataAttributes set
  var featureLayer = new FeatureLayer("Feature Layer URL", {
    id:     "featureLayer",
    styling:false,
    dataAttributes:["fb_pop"]
  });

  if (featureLayer.surfaceType === "svg") {
    on(featureLayer, "graphic-draw", function (evt) {
      var tableAttr = evt.graphic.attributes.fb_pop;
      var category;
      // class breaks
      if (tableAttr < classbreaks[0].value) {
        category = classbreaks[0].attribute;
      } else if (tableAttr >= classbreaks[0].value && tableAttr < classbreaks[1].value) {
        category = classbreaks[1].attribute;
      }
      // additional class breaks here
      } else if (tableAttr >= classbreaks[8].value) {
        category = classbreaks[9].attribute;
      }

      // set the data attribute for the current feature
      evt.node.setAttribute('data-classbreak', category);
    });
  }
  map.addLayer(featureLayer);
  return featureLayer;
}
Various ways to target features from CSS
There are different ways to target features that will be styled using CSS.
ID selectors (#<id>_layer) can be used where the ID is passed in the layer constructor. This is useful when targeting features only within a specific layer.
Class selectors (.class) can be used when the class name is passed in the layer constructor via a className option. This is useful when targeting features in more than one layer collectively.
Attribute
selectors:
Attribute fields from the layer can be added as custom data-attributes through the dataAttribute
option.
There are several new data attributes worth mentioning in the Graphic class that can be added
out of the box when styling is set to false:
data-unique-value: The graphic's unique value returned by UniqueValueRenderer.getUniqueValueInfo method.data-class-break: Class break index as returned by the ClassBreaksRenderer.getBreakIndex method.data-geometry-type
You can also apply a style to features based on computed data-attributes. For instance, using the D3 JavaScript toolkit we can use the library's built-in scale method quantize to sort our data into "buckets" and then apply a style to each bucket. Here is a sample for adding computed data-attributes.
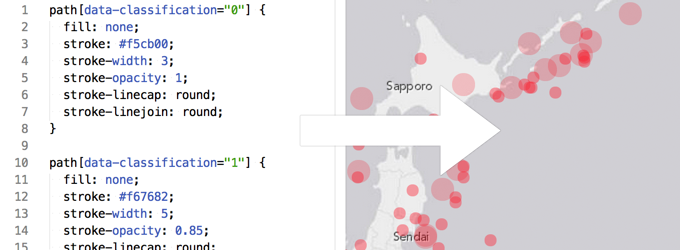
Styles are applied to features by targeting the path element. For instance, to apply a particular style to any feature containing the dataAttribute value 'classbreak0,' you could use the css style below:
 |
path[data-classbreak="classbreak0"] { stroke: rgb(255,245,220); stroke-width: 1pt; stroke-opacity: 0.35; fill: rgb(255,215,120); fill-opacity: 0.8; } |
Because we're using CSS, pseudo selectors like :hover can be used to apply a hover effect when mousing over graphics. More information about adding styles to paths can be found on the Mozilla Developer Network documentation for SVG.
 |
@keyframes highlight {
    100% {
      fill-opacity: 1;
      stroke-width: 4;
      stroke: rgb(220,20,60);
    }
  }

  @-webkit-keyframes highlight {
    100% {
      fill-opacity: 1;
      stroke-width: 4;
      stroke: rgb(220,20,60);
    }
  }

  path:hover {
    cursor: pointer;
    animation-duration: 0.2s;
    animation-name: highlight;
    animation-timing-function: linear;
    animation-fill-mode: forwards;
    -webkit-animation-duration: 0.2s;
    -webkit-animation-name: highlight;
    -webkit-animation-timing-function: linear;
    -webkit-animation-fill-mode: forwards;
}
|
Why not use Renderers for styling?
Renderers work by using an additional layer of abstraction on top of browsers' native vector drawing capabilities. One limitation of this approach is that we cannot target specific DOM elements since the underlying implementations may or may not use a DOM. Renderers in the JS API also lack an animation API. If you wanted to apply animation to your features, use CSS styling. However, it is currently easier to use complex shapes with Renderers than it is with CSS.
Samples
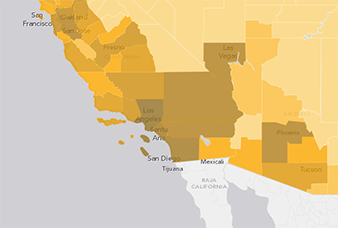
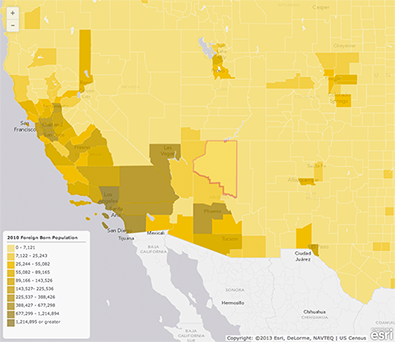
Foreign born population
This first sample
uses class breaks to draw the data set. In the code snippet below, an attribute value is used to
style any nodes that have the data attribute, a value used for the class breaks, and a label used in the legend.
require([
  "esri/map",
  "esri/layers/FeatureLayer",
  "dojo/_base/array",
  "dojo/dom-construct",
  "dojo/on",
  "dojo/parser",
  "dojo/ready"
], function (Map, FeatureLayer, array, domConstruct, on, parser, ready) {
    parser.parse();

    var map,classbreaks = [];

    ready(function () {
      // data-attributes, class break values, and legend labels
      classbreaks = [
        {
          attribute:"classbreak0",
          value:7121,
          legendLabel:"0 - 7,121"
        },
        {
          attribute:"classbreak1",
          value:25243,
          legendLabel:"7,122 - 25,243"
        },
        {
          attribute:"classbreak2",
          value:55082,
          legendLabel:"25,244 - 55,082"
        },
        {
          attribute:"classbreak3",
          value:89166,
          legendLabel:"55,082 - 89,165"
        },
        {
          attribute:"classbreak4",
          value:143527,
          legendLabel:"89,166 - 143,526"
        },
        {
          attribute:"classbreak5",
          value:225537,
          legendLabel:"143,527- 225,536"
        },
        {
          attribute:"classbreak6",
          value:388427,
          legendLabel:"225,537 - 388,426"
        },
        {
          attribute:"classbreak7",
          value:677299,
          legendLabel:"388,427 - 677,298"
        },
        {
          attribute:"classbreak8",
          value:1214895,
          legendLabel:"677,299 - 1,214,894"
        },
        {
          attribute:"classbreak9",
          value:7121,
          legendLabel:"1,214,895 or greater"
        }
      ];

    // draw legend items
    array.forEach(classbreaks, function (classbreak, i) {
      domConstruct.create("div", {
        innerHTML:'<svg width="20" height="20" version="1.1" xmlns="http://www.w3.org/2000/svg">' +
            '<path data-classbreak="' + classbreak.attribute + '" d="M 0 0 L 23 0 L 23 23 L 0 23 Z" />' +
            '</svg><span style="vertical-align: top; padding-left: 3px">' + classbreak.legendLabel + '</span>'
        }, 'legend');
      });

    addFeatureLayer();
  });

  function addFeatureLayer() {
    // set the styling and dataAttributes property
    var featureLayer = new FeatureLayer("http://services.arcgis.com/V6ZHFr6zdgNZuVG0/arcgis/rest/services/fbTrim/FeatureServer/0", {
      id:"featureLayer",
      styling:false,
      dataAttributes:["fb_pop"]
    });

    // loop through the attribute values and set the attribute for each feature
    if (featureLayer.surfaceType === "svg") {
      on(featureLayer, "graphic-draw", function (evt) {
        var tableAttr = evt.graphic.attributes.fb_pop;
        var category;
        if (tableAttr < classbreaks[0].value) {
            category = classbreaks[0].attribute;
        } else if (tableAttr >= classbreaks[0].value && tableAttr < classbreaks[1].value) {
            category = classbreaks[1].attribute;
        } else if (tableAttr >= classbreaks[1].value && tableAttr < classbreaks[2].value) {
            category = classbreaks[2].attribute;
        } else if (tableAttr >= classbreaks[2].value && tableAttr < classbreaks[3].value) {
            category = classbreaks[3].attribute;
        } else if (tableAttr >= classbreaks[3].value && tableAttr < classbreaks[4].value) {
            category = classbreaks[4].attribute;
        } else if (tableAttr >= classbreaks[4].value && tableAttr < classbreaks[5].value) {
            category = classbreaks[5].attribute;
        } else if (tableAttr >= classbreaks[5].value && tableAttr < classbreaks[6].value) {
            category = classbreaks[6].attribute;
        } else if (tableAttr >= classbreaks[6].value && tableAttr < classbreaks[7].value) {
            category = classbreaks[7].attribute;
        } else if (tableAttr >= classbreaks[7].value && tableAttr < classbreaks[8].value) {
            category = classbreaks[8].attribute;
        } else if (tableAttr >= classbreaks[8].value) {
            category = classbreaks[9].attribute;
        }
        // set the data attribute for the current feature
        evt.node.setAttribute("data-classbreak", category);
      });
    }
    map.addLayer(featureLayer);
    return featureLayer;
  }
});
Adding computed data-attributes
This sample uses quantize scales in
the D3 toolkit to define data classification and apply a style to each range of values.